Custom Fabrication
Custom RV Bumpers and Racks for Westminster Owners
In short
We build and install rear bumpers, receiver structure, bike and cargo racks, ladders, spare tire carriers, and generator or propane trays that tie into the chassis instead of the sidewall skin. Most jobs run $750 to $6,500 depending on size, material, and finish. Expect one to three weeks in the shop for a full bumper build with powder coat.
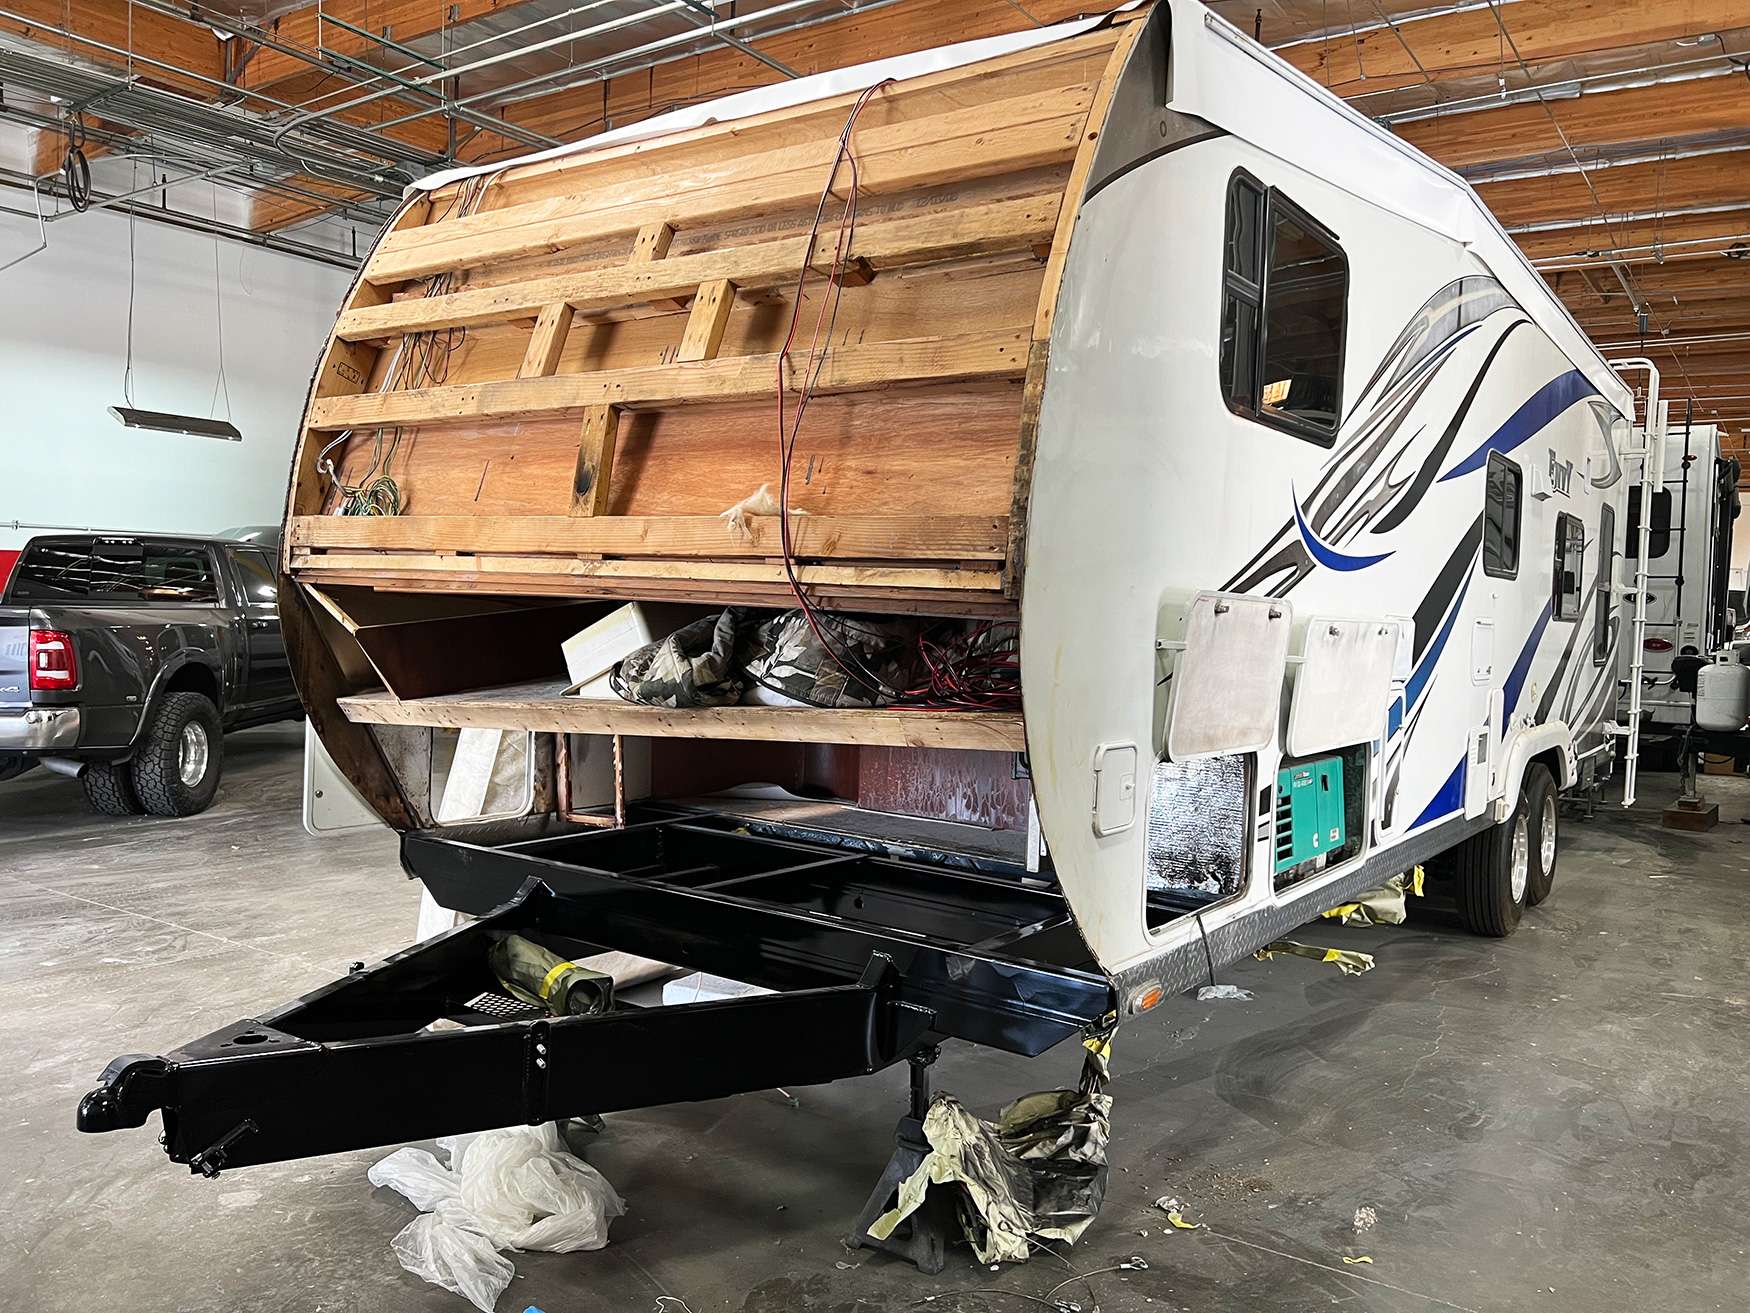
Custom RV bumpers and racks are the most requested fabrication work in the building, and they are also the work most often done badly elsewhere. A rack is only as good as what it bolts to, and on a coach that means finding real structure under a skin that is mostly foam. We design around the load path first, then the shape. That order is what keeps a rack from tearing a sidewall open on a rough road two seasons later.
What a Rear Bumper Replacement Actually Involves
The stock rear bumper on many coaches and trailers is a four inch or four and a half inch square steel tube bolted or welded to two frame extensions. It was designed to close out the back of the vehicle, hold a sewer hose, and take a light impact. It was not designed as a mounting platform. When one gets replaced it is usually because it is rusted through at the ends, bent from a low speed hit, or sagging from years of carrying weight it was never rated for.
Replacement starts by getting the vehicle level and measuring where the original sat relative to the body, because a bumper that is a half inch low or a degree off square is obvious from thirty feet away. We cut the old tube off, inspect and repair the frame extensions behind it, then build the new bumper in place with the receiver, mounts, and any trays tacked and checked before anything is welded out solid.
If you want the bumper to carry load, that gets designed in from the start. Carrying weight means heavier wall tube, gussets back to the frame rails, and sometimes a pair of additional extensions running forward to a second cross member. Adding that later to a bumper that was built as a bumper is more expensive than building it right the first time.
Hitch Ratings and Why a Bumper Rack Overloads Square Tube
The two inch receiver welded into a stock four inch bumper tube is not a frame mounted hitch. On most coaches it is rated for something modest, often a few hundred pounds of tongue weight, and that rating assumes a static load hanging close to the receiver. The trouble starts when a rack extends two or three feet behind that opening. Weight on the end of a lever multiplies the twisting force at the tube, and square tube is not strong in torsion.
This is the single most common failure we see. Two electric bikes at seventy pounds each, hung eighteen to thirty inches behind the receiver, produce a moment the bumper cannot handle. It does not fail on day one. It cracks the weld at the receiver, then the tube walls start to oil can, then the whole bumper droops and the rack starts hitting the ground on driveway transitions. By then the frame extensions are usually cracked too.
The fix is to stop hanging load on the bumper and start hanging it on the frame. A properly built rear carrier ties into the chassis rails with its own structure, passes through or around the bumper rather than depending on it, and puts the load path back where the vehicle can take it. That is more fabrication and more money, and it is the only version that lasts.
- Check the rating stamped on the receiver and on the coach data plate before buying any rack
- Every foot of extension behind the receiver multiplies the load the tube sees
- Electric bikes weigh two to three times what the rack was designed for
- Cracked welds at the receiver collar are the first visible warning
- Frame mounted carriers cost more up front and do not fail this way
- Weight distribution hitches do nothing for a cargo rack behind the axle
Bike, Cargo, Ladder, and Roof Rack Mounting
Bike and cargo racks come in two flavors here: hitch mounted with proper frame support behind them, or wall mounted, which we approach very carefully. A wall mounted rack on a laminated coach has to tie into framing members, not skin, and it needs a backing plate inside the wall that spreads the load across several of those members. Anything less will eventually oval the holes, crack the skin, and let water into the foam core.
Ladders are the same problem in a taller package. A ladder carries a person's full weight plus whatever they are dragging up to the roof, and the top mount takes an outward pull every time someone leans back. We mount ladders into the roof frame and the wall framing with backing plates behind both, then seal every penetration. A ladder that came from the factory and now feels springy usually has a top mount working loose in a soft wall, and that gets repaired before it gets reused.
Roof racks add a third issue: everything on the roof has to be waterproof and stay waterproof. We prefer mounts that land on the roof framing members, use a sealant compatible with the specific roof membrane, and keep the whole assembly low enough that it does not turn into a sail. We will also tell you honestly when a roof was not built for what you want to carry, which happens more often than owners expect.
Spare Tire Carriers, Generator Trays, and Propane Racks
A spare tire carrier looks simple until you weigh the tire. A full size truck or coach tire and wheel is easily a hundred pounds, and it lives on the back of the vehicle where every bump makes it bounce. Swing away carriers add a latch and pivot that both wear, and a worn pivot lets the tire move enough to break its own mount. We build carriers with a serviceable pivot, a real latch, and a rest that carries load when it is closed rather than letting the hinge take everything.
Generator and propane trays are the same job with different consequences. A generator tray has to hold a vibrating machine, allow airflow, keep exhaust away from anything it can melt, and be reachable for service. A propane tray has to hold tanks securely, drain, and keep the tanks away from heat and road spray. Both need to bolt to structure that can take dynamic load, which on a trailer usually means the A frame and on a coach usually means dedicated frame extensions.
We build these with removal in mind, which is a detail most owners never think to ask about until it bites them. Anything you have to service should come out without cutting welds. That means bolted subassemblies with captive hardware where it makes sense, fasteners you can reach with a normal wrench rather than a specialty tool, and enough access clearance around the unit to actually work. All of it gets designed in at the drawing stage instead of discovered later when somebody is flat on their back in a parking lot trying to get a bolt started.
- Swing carriers get a latch that carries load, not a hinge doing both jobs
- Generator trays need airflow, exhaust clearance, and service access designed in
- Propane trays need secure tank retention and a path for water to drain
- Bolted subassemblies so servicing does not require a grinder
- All trays coated inside and out, including the faces you never see
Tongue Weight, Rear Overhang, and the Data Plate Limits
Every RV has a data plate with gross vehicle weight rating, gross axle weight ratings front and rear, and on a trailer a tongue weight figure. Those numbers are the honest structural limits of the vehicle and they do not change because you bought a bigger rack. Adding two hundred pounds behind the rear axle does not just add two hundred pounds to the rear axle. It levers weight off the front axle, which is the axle that steers and, on a motorhome, does most of the braking.
On a travel trailer the same physics run the other direction. Load piled on the rear bumper reduces tongue weight percentage, and a trailer whose tongue weight drops below roughly ten percent of its total weight becomes prone to sway. We have straightened enough bent A frames from sway incidents to take this seriously. Before we build a rear carrier for a trailer, we talk about what is going on it and what that does to the balance.
This is where we sometimes talk a customer out of the build they came in asking for. If the coach is already close to its rear axle rating loaded for a trip, a three hundred pound cargo carrier is not a fabrication problem, it is a weight problem, and no amount of steel fixes it. Weighing the vehicle loaded is cheap information and it changes what we recommend.
Finish Choices and What the Work Costs
Powder coat is the better finish for racks, carriers, and trays. It cures into a thick, hard film that shrugs off the scraping and impact those parts take, and it wraps edges better than a wet coat. The limits are practical: the part has to fit our oven, it cannot have heat sensitive components attached, and a deep chip years later gets touched up with paint anyway. Wet paint is the right choice for large weldments, for parts we install and then finish in place, and whenever we need to match existing body color.
Here is a real bumper job. A steel rear bumper replacement with an integrated two inch receiver and frame gussets: 3 hours measuring and pattern work, 7 hours cutting and fit up, 5 hours welding, and 3 hours prep and coating. That is 18 hours at the $210 body and fabrication rate, or $3,780 in labor. Steel tube, plate, and the receiver stub come to about $340 in material; that is over $100 so it carries 35 percent markup to $459, and 7.75 percent sales tax on materials brings it to $494.57. The job totals about $4,274.57.
Because that is over $2,000, we collect a 50 percent deposit of roughly $2,137 before we start cutting. A simpler job sits at the other end of the range: adding a hitch mounted bike carrier to an existing bumper that already has adequate structure might be 3 hours at $210 for $630 in labor, plus a $310 carrier at 35 percent markup and tax, which is about $451, for roughly $1,081 total and no deposit required. What moves a job up the range is frame reinforcement, aluminum instead of steel, complex shapes, and color matched paint instead of black powder coat.
- Body and fabrication labor: $210 per hour
- Mechanical labor where driveline or suspension has to come out: $260 per hour
- Parts and material: 100 percent markup at or under $100, 35 percent above $100
- Sales tax: 7.75 percent on parts and materials; labor is not taxed in California
- Deposit: 50 percent on any job above $2,000
- Powder coat adds cure time to the schedule and durability to the part
Questions
Frequently asked questions
Can I just put a bike rack in the hitch on my rear bumper?
Check the rating first, and be honest about what you are hanging on it. A receiver welded into a stock four inch bumper tube is typically rated for a modest tongue weight with the load close in. A bike rack puts the load a foot and a half to three feet further back, and that leverage is what breaks the tube. Two electric bikes at seventy pounds apiece will crack the receiver welds on most factory bumpers within a season or two of real use. If you want to carry that kind of weight, the carrier needs to tie into the chassis rails with its own structure rather than depending on the bumper.
How much weight can a custom rear bumper actually carry?
It depends entirely on how it is built and what it ties into, which is why we ask what is going on it before we design it. A bumper built as a closeout with two frame extensions is a bumper. A bumper built as a load platform gets heavier wall tube, gussets running back to the frame rails, and sometimes additional extensions to a forward cross member. We can build to a target load, and we will tell you the number the finished assembly is designed for. The other limit is the vehicle itself. Your rear gross axle weight rating on the data plate does not increase because the bumper got stronger.
Where do you mount a ladder so it does not tear up the sidewall?
Into structure, with backing plates, and never into skin alone. A ladder takes a person's full weight plus an outward pull at the top mount every time somebody leans back on it. On a laminated wall we locate the framing members behind the skin, install backing plates inside the wall that spread the load across several of them, and tie the top mount into the roof framing. Then every fastener that penetrates the exterior gets sealed with a product compatible with that specific skin and roof material. If your existing ladder feels springy, the top mount is almost certainly working loose in a soft wall, and that damage gets repaired before anything gets reinstalled.
Powder coat or paint, which should I pick?
Powder coat for anything that gets scraped, loaded, or kicked, which covers most racks, carriers, and trays. It cures into a much thicker and harder film than a wet coat, it wraps sharp edges better, and it holds up to the abuse those parts see. Paint is the right answer in three situations: the part is too large for the oven, the part has heat sensitive components already attached, or you need it to match an existing body color that powder simply cannot reproduce. Cost between the two is close for a small part. On a large weldment, paint is often less because there is no oven cycle in the schedule.
What does a full rear bumper replacement cost?
A typical steel rear bumper with an integrated two inch receiver and frame gussets runs about 18 hours: roughly 3 hours measuring and pattern work, 7 hours cutting and fit up, 5 hours welding, and 3 hours prep and coating. At the $210 body and fabrication rate that is $3,780 in labor. About $340 of steel and hardware carries 35 percent markup to $459, and with 7.75 percent sales tax on materials that is $494.57. Total is roughly $4,275, with a 50 percent deposit of about $2,137 to start since the job is above $2,000. Simple bumper repairs without a rebuild land far lower, often in the $750 to $1,500 range.
Can you build a tray for a generator or a pair of propane tanks?
Yes, and both are common. A generator tray has to hold a vibrating machine securely, allow enough airflow for cooling, keep the exhaust path away from anything it can damage, and leave you room to service the unit without removing the tray. A propane tray needs positive tank retention, drainage so water does not sit around the tank feet, and separation from heat and road spray. Both bolt to structure that can take dynamic load: the A frame on a trailer, or dedicated frame extensions on a coach. We build them as bolted subassemblies wherever possible so servicing later does not require cutting welds.
Why does adding weight at the back change how the coach drives?
Because weight behind the rear axle acts on a lever. Two hundred pounds hung three feet behind the axle does not simply add two hundred pounds to the rear axle load. It also lifts weight off the front axle, and the front axle is what steers and does most of the braking. You feel it as light steering, more wander in a crosswind, and longer stopping distances. On a travel trailer the same effect reduces tongue weight percentage, and once tongue weight drops below roughly ten percent of the trailer's total, sway becomes likely. Weighing the vehicle loaded before you build is cheap and it often changes the design.
How long will my rig be in the shop for a rack or bumper build?
Most bumper and rack builds run 5 to 15 business days. Pure fabrication time is often less than that; what sets the schedule is material availability in the right sizes, the cure cycle for powder coat or paint, and the fit and finish checks after the coating is done. A simple hitch mounted carrier on structure that is already adequate can be a two or three day job. Frame reinforcement, aluminum construction, or color matched paint pushes toward the long end. We give you a written date range with the estimate, and we call if anything moves it rather than letting you find out at pickup.
Standard on every job
What is included
These are not upgrades. They are how the work is run on every vehicle that comes through the building.
Full teardown where it is needed
We do not estimate through a closed panel. If the damage path runs behind trim or skin, we open it and document what is actually there.
Written, itemized scope
Parts, labor hours, and materials listed separately against the posted rate, so every line is something you can question.
Direct carrier communication
We talk to the adjuster so you are not relaying technical detail between two parties who both expect you to already understand it.
Supplement handling
When teardown finds more than the original inspection, we document and submit the supplement rather than absorbing it into a vague overage.
Correct repair sequence
Structural before cosmetic, every time. A straight body over a bent frame is a repair that fails its second life.
Systems tested under load
Electrical, plumbing, generator, and climate systems are run and verified before delivery, not just reconnected and assumed good.
Photo documentation throughout
Before, during, and after. Useful for your records, and decisive if a claim is ever revisited.
Delivery walkthrough
We go over what was done, what was replaced, and what to watch, in person, with the vehicle in front of you.
How the work runs
Our six step repair process
The same sequence on every vehicle, whether it is a single coach or a fleet of box trucks.
- 01
Assessment and documentation
We put the vehicle on the floor, pull panels where we need to see behind them, and photograph everything. Hidden damage found now is damage that does not become a supplement argument later.
- 02
Written estimate
You get a line by line estimate with parts, labor hours, materials, and the posted rate applied to each. Nothing is bundled into a single number you cannot check.
- 03
Carrier coordination
If a claim is involved we deal with the adjuster directly, submit the documentation, and handle supplements when teardown reveals more than the first inspection showed.
- 04
Authorization and scheduling
Once the scope is approved we confirm the deposit, order parts, and give you a realistic slot. Special order parts drive the timeline more often than labor does.
- 05
Repair
Structural first, then body, then paint, then systems and interior. The sequence is not negotiable because each stage has to be right before the next one covers it up.
- 06
Quality check and delivery
Multi point inspection, systems tested under load, paint inspected under corrected lighting, and a walkthrough with you before the vehicle leaves.
Keep reading
Related pages
Related services
Vehicles we repair
Talk to a repair specialist today
Tell us what happened and we will tell you what the repair actually involves, what it costs, and how long it takes. We work directly with every major carrier and serve Westminster owners and fleets from our 35,000 square foot facility.
Posted labor rates are published on our prices page. Diagnostic and systems assessment fees are credited against an authorized repair.