Collision and Structural
RV Structural Damage Assessment and Teardown Report
In short
An RV structural damage assessment costs $285 to $1,800 depending on how much teardown it takes, billed at $285 per hour of diagnostic labor and credited against an authorized repair. A separate RV systems assessment is $150 and is also credited. Our Westminster estimators deliver a line item report with photographs that an adjuster can work from directly.
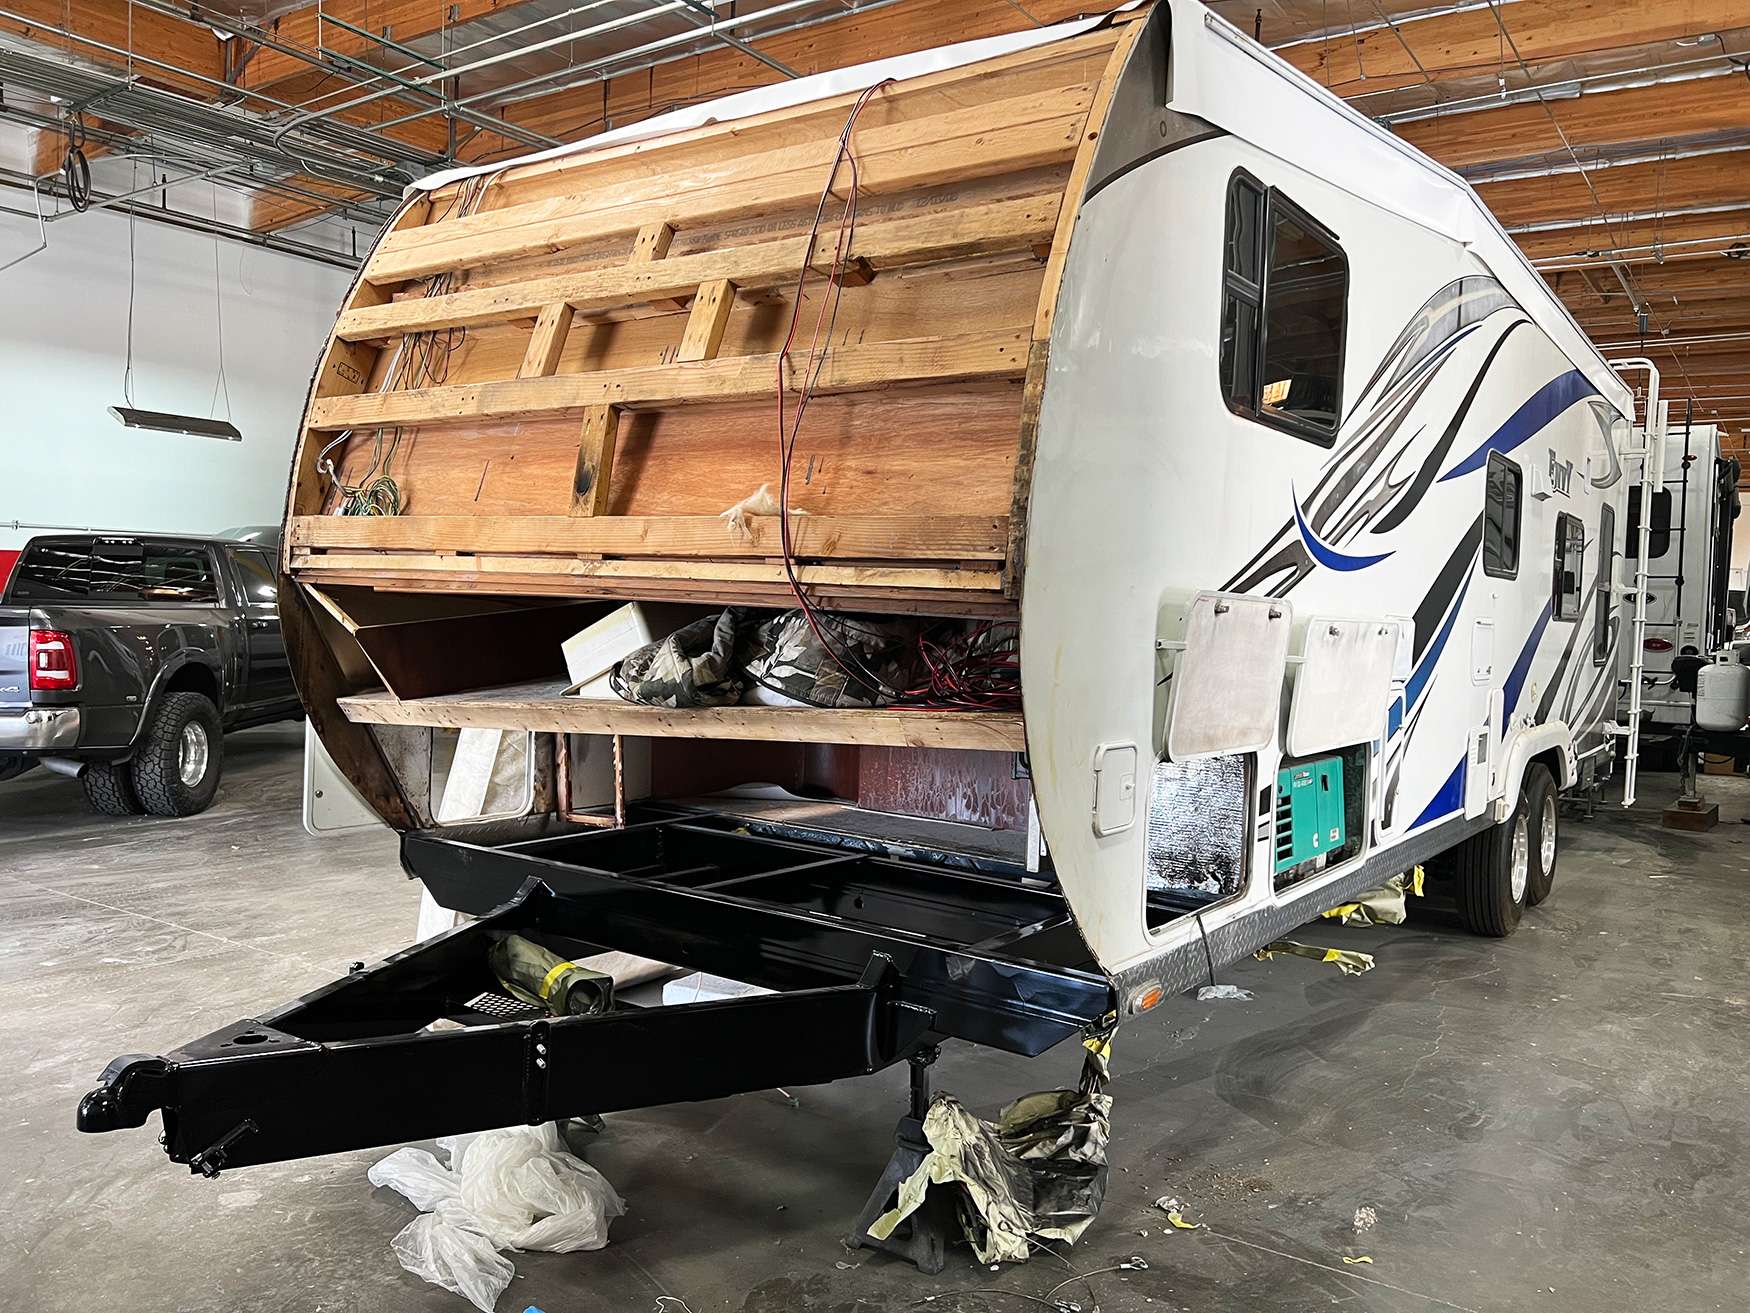
An RV structural damage assessment is paid diagnostic work, not a parking lot walk around, and the fee is credited against an authorized repair. Diagnostic labor bills at $285 per hour. What you get is a moisture map, tap test results, laser measurements against factory reference points, photo documentation, and a line item report with parts and labor operations an adjuster can read. Owners in Westminster use it to decide whether to file a claim at all.
What the Assessment Includes
The assessment is a defined sequence, not a look and a guess. It starts with a full visual survey of the unit, inside and out, documenting the damage zone and every seam, fastener line, and sealant bead within reach of the impact. We record the model year, floor plan, chassis, and any prior repair we can identify, because a previously repaired area behaves differently and affects both the repair plan and the claim.
From there it moves through tap testing to find laminate separation, moisture mapping with a meter to find water intrusion, and laser measurement against factory reference points where structure may have moved. If the visible evidence points to hidden damage, we request authorization for partial teardown so we can actually look rather than speculate. Nothing gets removed without your approval and a stated hour estimate for that step.
The deliverable is a written report. Photographs organized by area, the moisture map with readings, the measurement sheet with tolerances, and a line item repair plan listing part numbers, labor operations, and hours at the applicable rate. That document is written to be read by an adjuster, which means it uses standard operation descriptions rather than shop shorthand. You get a copy regardless of whether you proceed with the repair.
- Full interior and exterior visual survey with damage zone documentation
- Tap testing across the damaged panel and surrounding area
- Moisture mapping with meter readings recorded by location
- Laser measurement against factory reference points where structure moved
- Partial teardown performed only with your written authorization
- Line item report with part numbers, operations, and hours
How the Fee Credit Works
Diagnostic labor bills at $285 per hour. If you authorize the repair we quote, those diagnostic hours come off the repair invoice as a credit. A two hour assessment at $570 that leads to an authorized $9,000 repair means you pay $9,000, not $9,570. The credit applies to the assessment hours specifically, and it applies when the repair is authorized at our shop. That is the whole mechanism and there is nothing buried in it.
There is also a $150 RV systems assessment, which is a separate and narrower check covering power, plumbing, propane, and slide operation. On a collision file it is usually run alongside the structural assessment, because systems damage in the impact zone is common and invisible from outside. That $150 is credited against an authorized repair on the same terms as the diagnostic hours.
If you decide not to proceed, you keep the report and you owe the diagnostic time. That is a fair trade and most owners see it that way once they hold the document. A written assessment with photographs, meter readings, and measurements is what a carrier acts on and what a second shop can quote against. It is a portable asset, not a fee for the privilege of getting an opinion.
Moisture Mapping and the Tap Test
The tap test is exactly what it sounds like and it is one of the most reliable diagnostic methods we have on a laminated wall. A sound laminated panel returns a sharp, consistent tone. A panel where the fiberglass has separated from the substrate returns a dull, hollow sound. We tap in a grid pattern across the damaged area and outward until the tone goes back to normal, then mark the boundary. That boundary is almost always significantly larger than the visible damage.
Moisture mapping runs in parallel with a pin type or pinless meter, taking readings on a grid across the interior wall surfaces, around window and door openings, along the floor edge, and in the compartment areas below. Each reading is logged by location. Elevated readings that trace a path back to a specific seam or fastener line tell you where water is entering, which is the difference between fixing the leak and repeatedly repairing the damage it caused.
Together these two methods define the actual repair boundary before anything is cut. A collision repair that stops at the visible damage on a wall with laminate separation extending twelve inches further will crack again along that boundary. Owners are often surprised how far the marked area extends past the dent. That surprise is exactly the value of the assessment, and it is the number that should drive the claim.
- Grid pattern tap testing outward until tone returns to normal
- Separation boundary marked and photographed before any cutting
- Meter readings logged by location across walls, openings, and floor edge
- Elevated readings traced back to the entry seam or fastener line
- Repair boundary set from test results, not from the visible dent
- Both results included in the report with photographs
Laser Measurement Against Factory Reference Points
When the damage pattern suggests structure moved, measurement replaces opinion. We level the unit on stands, establish a datum plane, and shoot the manufacturer specified reference points with a laser system. On a trailer that is axle centers, spring hanger locations, coupler position, and rail ends. On a motorhome chassis it is the control points the chassis maker publishes. Every reading is compared against the specification and recorded with its tolerance.
This is what separates a real assessment from a visual estimate. A rear corner impact on a long trailer can put a measurable twist at the tongue, and nothing about the appearance of the rear corner tells you that. Conversely, damage that looks alarming sometimes measures perfectly within tolerance, which turns what an owner feared was a frame job into skin work. Both outcomes save money, and only measurement produces either one.
The measurement sheet goes into the report with the tolerance for each point noted alongside the reading. Adjusters take that document seriously because it is verifiable and repeatable. If the repair proceeds, the same points get shot again after correction, and that post repair sheet becomes part of the closing documentation on the file. Anyone can claim a frame is straight. A sheet with numbers on it is a different kind of statement.
Reading the Report Your Adjuster Gets
The report is organized the way a claim gets processed. Vehicle identification and condition first, then the damage description, then the diagnostic findings section containing tap test boundaries, moisture readings, and measurement results with photographs keyed to each. After that comes the repair plan as line items, each with an operation description, part number where applicable, quantity, and hours at the applicable rate.
Rates appear on the document explicitly. Body and paint at $210 per hour, mechanical at $260 per hour, diagnostic at $285 per hour, detail at $95 per hour, and paint supplies at $55 per paint hour. Parts show markup at 100 percent for items at or under $100 and 35 percent above that, and sales tax at 7.75 percent is applied to parts and materials only, never to labor. An adjuster can audit every line without calling to ask what something means.
What the report does not do is hide contingency in vague operations. If teardown is likely to reveal more, the report says so, names the specific areas of concern, and states what additional teardown would cost to resolve. Carriers respond much better to a document that identifies uncertainty up front than to a supplement that arrives three weeks later describing something nobody mentioned at intake.
- Vehicle identification, condition, and damage description up front
- Diagnostic findings with photographs keyed to each result
- Line items with operation, part number, quantity, and hours
- All labor rates and the paint supply rate stated on the document
- Parts markup and 7.75 percent tax on materials shown separately
- Areas of remaining uncertainty named with the cost to resolve them
Questions
Frequently asked questions
Why do I have to pay for an assessment?
Because a real assessment is hours of skilled work, not a glance in a parking lot. Tap testing a wall in a grid, logging moisture readings by location, leveling a unit and shooting laser measurements against factory reference points, and writing a line item report with photographs takes one to six hours depending on the unit and the damage. That time bills at $285 per hour and is credited against an authorized repair. A shop that gives you a number without doing any of that is guessing, and that guess will change the moment work starts.
How does the credit against the repair actually work?
The diagnostic hours come off the repair invoice when you authorize the work. If the assessment takes two hours, that is $570 in diagnostic labor. If you then authorize a $9,000 repair, you pay $9,000, not $9,570. The $150 RV systems assessment works the same way and is credited on the same terms. If you decide not to proceed, you owe the diagnostic time and you keep the full written report, photographs, meter readings, and measurement sheet included, which a carrier or another shop can work from directly.
What is the $150 RV systems assessment and do I need it?
It is a narrower check covering shore and twelve volt power, plumbing, propane, and slide room operation. On a collision file we usually run it alongside the structural assessment, because wiring runs, water lines, and propane lines pass through exactly the areas that get hit and the damage is invisible from outside. It is $150, credited against an authorized repair. If your damage is a scuffed corner cap well away from any systems, you can skip it. If anything hit near a slide, a compartment, or the front or rear cap, run it.
How long does an assessment take?
Two hours to three days, driven almost entirely by teardown depth. A visual survey with tap testing and moisture mapping on an accessible damage zone is often done in an afternoon. Adding laser measurement means leveling the unit on stands and establishing a datum plane, which adds several hours. Partial teardown, meaning removing interior panel, trim, or a compartment liner to see behind the impact, adds a day or more including reassembly. We give you the hour estimate for each step before we do it, so nothing on the invoice arrives as a surprise.
Will my insurance pay for the assessment?
Frequently yes, when the damage is from a covered event and the assessment is part of establishing the scope of the claim. Carriers generally accept documented diagnostic time as a legitimate line on a collision file, particularly when the resulting report is what allowed them to write an accurate estimate. We submit it as a line item with the rate stated. Where it gets harder is when the assessment concludes the damage is from wear, fatigue, or long term water intrusion rather than an impact, since those are usually policy exclusions and the diagnostic time becomes an owner expense.
Can you tell me what is wrong without taking anything apart?
Partially. Tap testing tells us where laminate has separated, moisture mapping tells us where water is and often where it entered, and laser measurement tells us whether structure moved. Those three methods answer a great deal without removing a single fastener. What they cannot show is the actual condition of framing members, wiring runs, plumbing, and insulation behind the wall. When the non invasive results say something is wrong back there, opening a defined area is the only honest way to finish the answer, and we quote that scope in hours before we start.
What if the assessment finds more damage than I expected?
That is the normal outcome on collision work and it is the entire reason to do the assessment before anyone commits. Laminate separation typically extends well past the visible dent, and impact energy travels through a frame so the damage is rarely confined to where you can see it. Finding that out during a $900 assessment is a good day. Finding it out three weeks into a repair, after a shop already wrote a low estimate and your carrier already approved it, means a supplement fight and a schedule slip. The report is what prevents that sequence.
Can I take your report to another shop or my insurer?
Yes. It is your document and you keep it whether or not you have work done here. It is written to be read by an adjuster, with standard operation descriptions, part numbers, quantities, hours, stated labor rates, parts markup shown separately, and 7.75 percent tax applied to materials only. Photographs are keyed to each diagnostic finding and the measurement sheet lists tolerances alongside readings. That format is deliberately portable. A carrier can process it and a second shop can quote against it without having to re inspect the unit from scratch.
Standard on every job
What is included
These are not upgrades. They are how the work is run on every vehicle that comes through the building.
Full teardown where it is needed
We do not estimate through a closed panel. If the damage path runs behind trim or skin, we open it and document what is actually there.
Written, itemized scope
Parts, labor hours, and materials listed separately against the posted rate, so every line is something you can question.
Direct carrier communication
We talk to the adjuster so you are not relaying technical detail between two parties who both expect you to already understand it.
Supplement handling
When teardown finds more than the original inspection, we document and submit the supplement rather than absorbing it into a vague overage.
Correct repair sequence
Structural before cosmetic, every time. A straight body over a bent frame is a repair that fails its second life.
Systems tested under load
Electrical, plumbing, generator, and climate systems are run and verified before delivery, not just reconnected and assumed good.
Photo documentation throughout
Before, during, and after. Useful for your records, and decisive if a claim is ever revisited.
Delivery walkthrough
We go over what was done, what was replaced, and what to watch, in person, with the vehicle in front of you.
How the work runs
Our six step repair process
The same sequence on every vehicle, whether it is a single coach or a fleet of box trucks.
- 01
Assessment and documentation
We put the vehicle on the floor, pull panels where we need to see behind them, and photograph everything. Hidden damage found now is damage that does not become a supplement argument later.
- 02
Written estimate
You get a line by line estimate with parts, labor hours, materials, and the posted rate applied to each. Nothing is bundled into a single number you cannot check.
- 03
Carrier coordination
If a claim is involved we deal with the adjuster directly, submit the documentation, and handle supplements when teardown reveals more than the first inspection showed.
- 04
Authorization and scheduling
Once the scope is approved we confirm the deposit, order parts, and give you a realistic slot. Special order parts drive the timeline more often than labor does.
- 05
Repair
Structural first, then body, then paint, then systems and interior. The sequence is not negotiable because each stage has to be right before the next one covers it up.
- 06
Quality check and delivery
Multi point inspection, systems tested under load, paint inspected under corrected lighting, and a walkthrough with you before the vehicle leaves.
Keep reading
Related pages
Related services
Vehicles we repair
Talk to a repair specialist today
Tell us what happened and we will tell you what the repair actually involves, what it costs, and how long it takes. We work directly with every major carrier and serve Westminster owners and fleets from our 35,000 square foot facility.
Posted labor rates are published on our prices page. Diagnostic and systems assessment fees are credited against an authorized repair.