Interior Remodeling
RV Flooring Replacement for a Chassis That Twists
In short
RV flooring replacement on a 30 foot coach typically runs $6,500 to $9,500 and takes 6 to 15 business days, covering roughly 210 square feet of usable floor. Most of the labor is furniture removal, demolition and subfloor inspection rather than laying material. Rigid core vinyl plank is the usual choice because it tolerates chassis flex and stays light.
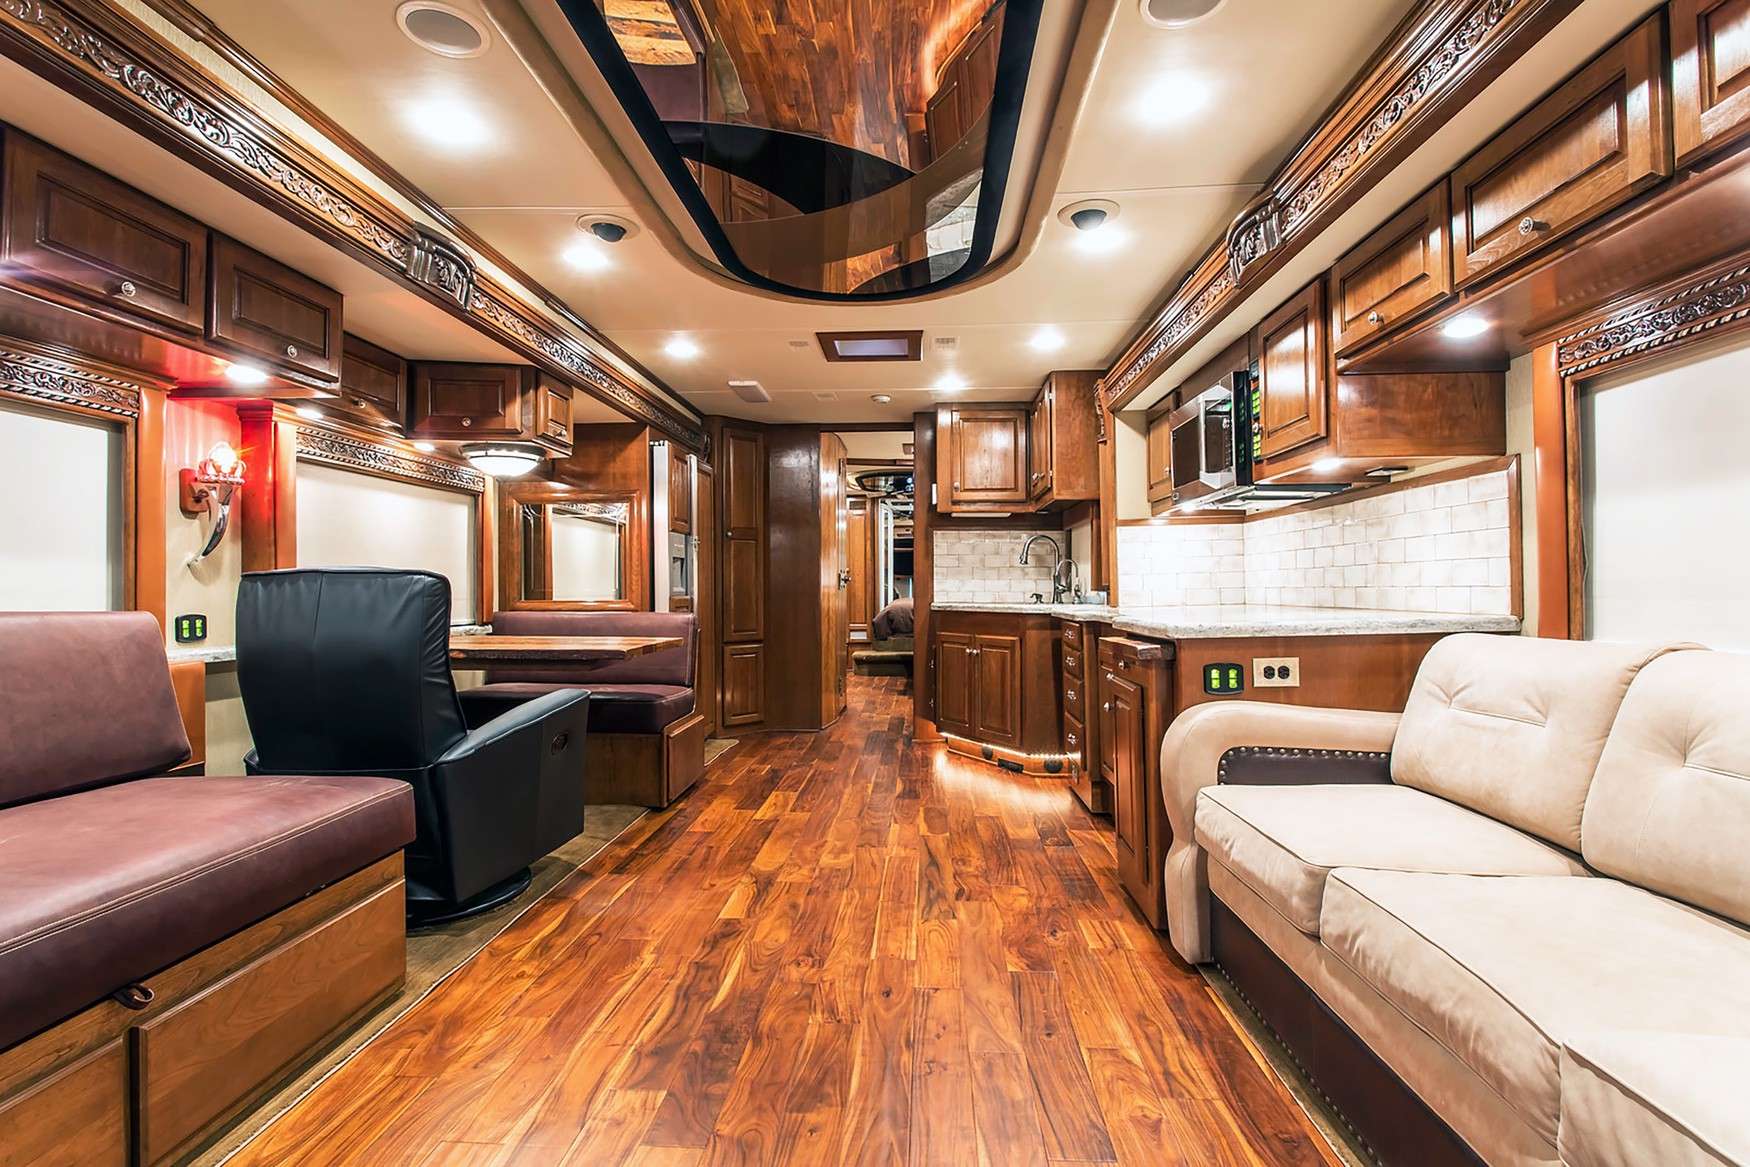
A proper rv flooring replacement is mostly demolition and inspection, and only about a third of the hours go into laying the new floor. Everything bolted to the deck has to come out, the slide rooms have to be run in and out to reach the floor underneath, and the subfloor has to be probed for rot before a single plank gets cut. Westminster owners usually find at least one soft spot they did not know about.
What Comes Out Before the Floor Does
Flooring hours are mostly not flooring. On a typical coach the dinette is bolted through the deck, the sofa or theater seats are lagged into blocking, the bed platform is screwed and often stapled, the toilet has to come up off its flange, and every run of base trim has to be pulled without splitting it. On a motorhome add the driver and passenger seat pedestals if the new floor runs forward into the cab area.
Some of that furniture was never designed to come out twice. Coach dinettes are frequently assembled before the wall panels went on at the plant, which means the fasteners you need are behind a panel that is now finished. Theater seating with power recline has wiring routed down through the deck. We plan for those discoveries because they are normal, and they are the main reason a flooring quote carries a range instead of a single number.
We photograph everything before it comes out, bag the hardware by location and label it. Removal and reinstallation are quoted as separate lines on your estimate so you can see both halves of the cost. On a 30 foot coach the two together are typically 8 to 12 hours, roughly a third of the labor. If you are considering new furniture, decide before demolition, because putting the old dinette back and swapping it six months later means paying for the same removal twice.
Slide Rooms and the Floor That Runs Under Them
The floor has to continue under the slide rooms. If it stops at the slide opening you get a visible edge, a lip that catches dirt and toes, and a seal that no longer wipes across a flat surface. Doing it correctly means running the rooms out, flooring the exposed main deck, then bringing each room in partway to lay the covered section and back out to finish the edge. It adds hours, and skipping it is the most common shortcut in low bid flooring work.
Slide room floors are their own job. Most slide boxes have a thin deck, often three eighths or half inch ply, sometimes with a lightweight substrate over it, and they carry a great deal of weight relative to that thickness. The slide floor also sits directly under the seal that fails first on almost every coach, which is why it is where we find rot most often. A soft slide floor gets addressed before any finish material goes down over it.
Floor height under a slide is a hard constraint, not a preference. Add too much thickness and the room drags on the new floor, or the wiper seal loads hard enough to tear itself apart within a season. We measure the clearance under each room at the estimate and pick a material stack that fits it. That is one reason we lean toward 5mm rigid core plank rather than a 12mm laminate on coaches with large rooms.
- Run slides out, floor the main deck, then cycle each room to finish underneath
- Measure slide clearance before committing to any material thickness
- Inspect the slide deck for rot while it is exposed, since seals fail there first
- Keep transitions under the slide box, not at the opening, to avoid a visible edge
- Confirm the wiper seal still contacts flat once the new floor is in
- Reset slide rollers and check topper tension after any change in deck height
Subfloor Rot, Luan and Plywood Decking
Once the old covering is off we probe the deck. An awl and a moisture meter tell you most of what you need within an hour. We check the perimeter first, then every slide opening, then around the toilet flange, the entry step, the water heater bay wall, and anywhere a plumbing line passes through the floor. Soft, dark, or a meter reading above roughly 16 percent means the deck comes out in that area rather than getting covered up.
Decking construction differs by builder. Many towables use five eighths inch plywood over aluminum or steel structure, some use a laminated panel with a foam core between thin skins, and some use luan over a subframe with the finish material bonded straight to it. Luan is the worst case, because it delaminates once it has been wet and cannot be dried and reused. Plywood decking that is only surface damp along one edge can often be dried, treated and kept in place.
Cutting out rot is straightforward carpentry done in an awkward position. We cut back to sound material at a joist or structural member, scarf in matching thickness plywood, block the seams underneath, seal the cut edges and refasten to structure. A 12 square foot patch typically adds 6 to 10 hours of labor at $210 per hour, which is $1,260 to $2,100, plus decking material. A full slide floor is a larger conversation and gets quoted after the room is pulled.
Choosing Between Vinyl Plank, Sheet Vinyl, Laminate and Carpet
Rigid core vinyl plank is what we install most often. It handles flex better than laminate, it is genuinely waterproof at the plank itself, it is light at roughly 1.5 pounds per square foot in 5mm, and a damaged plank in the middle of a room can be replaced later. Its weakness is that a floating plank floor needs a proper perimeter gap and correct transitions, and in a coach that means paying close attention where cabinets and slide rooms land.
Sheet vinyl is the lightest and least expensive option, it has no seams for water to get through, and it is what the factory used on most coaches for good reason. It also shows every irregularity in the deck beneath it, dents under furniture feet, and cannot be repaired invisibly once torn. Laminate is the material we push back on hardest: the core swells when wet, it is heavy at roughly 2.4 pounds per square foot, and it clicks and creaks on a deck that flexes.
Carpet still makes sense in a bedroom and on slide room floors where noise matters. It is light, it is quiet, and it hides deck irregularity that would telegraph through sheet goods. It also absorbs everything, and in a coach that sits closed for weeks at a time it holds odor. Most owners we work with end up with plank through the living area and galley and carpet in the bedroom, which is a sensible split on both weight and comfort.
- Rigid core plank at 5mm: about 1.5 pounds per square foot, waterproof, repairable
- Sheet vinyl: lightest and cheapest, seamless, but telegraphs every deck flaw
- Laminate at 12mm: about 2.4 pounds per square foot and swells at the core if wet
- Carpet: light and quiet, best confined to the bedroom and slide room floors
- Skip tile in any form on a chassis that twists under load
- Match total material thickness to slide clearance before ordering anything
Adhesives, Flex and Heat
A coach body twists. Back one wheel onto a curb and watch a door that used to close cleanly start binding at the top corner. That movement goes straight into the floor, and it is why rigid assemblies fail at the seams. Floating floors handle it better than fully glued ones across open areas, but around the perimeter and under cabinet runs you still need the deck itself to be stiff and properly fastened before any finish material goes down over it.
Adhesive selection matters more here than in a house because of heat. A closed coach parked in Southern California sun runs past 120 degrees at the floor and considerably hotter at a south facing window. Standard pressure sensitive flooring adhesive softens at those temperatures, plank edges creep, and you find gaps at the walls by the end of the first summer. We use adhesives rated for elevated service temperature and we follow the open time on the label rather than rushing a set to save an hour.
Expansion is the other half of the problem. Every floating floor needs a perimeter gap, and in a coach that gap has to be planned around slide openings, cabinet toe kicks and the entry step rather than measured off a wall. Too tight and the floor peaks in July. Too loose and you see daylight under a trim piece cut for a house sized reveal. We scribe trim to fit the actual wall line, which is slower and looks correct for the life of the floor.
Square Footage Math and Real Cost Examples
A 30 foot coach is not 30 feet of floor. Subtract the cab or hitch area, the bathroom, the shower pan, the area under fixed cabinets, and the bed platform if you are not going underneath it. Usable open floor on a 30 foot unit typically lands between 190 and 230 square feet including slide rooms. We measure it room by room at the estimate and order with 10 percent added for cuts, waste and pattern alignment.
Here is a full job on that coach at 210 square feet. Labor: 4 hours furniture removal, 5 hours demolition, 3 hours deck inspection and prep, 12 hours plank installation, 3 hours transitions and trim, 4 hours reinstallation. That is 31 hours at $210 per hour, or $6,510. Material: 231 square feet of plank at $3.10 costs $716.10 and marks up 35 percent to $966.74. Adhesive and underlayment at $240 becomes $324. Transitions at $160 become $216.
Parts total $1,506.74 and tax at 7.75 percent adds $116.77, so the invoice lands at $8,133.51 with a 50 percent deposit of $4,066.76 collected at authorization. A smaller job looks very different. One slide room floor at 42 square feet is 7 hours at $210, or $1,470, plus 46 square feet of plank costing $142.60 marked up to $192.51, and $85 of adhesive marked up to $170. Parts of $362.51 plus $28.09 of tax puts that invoice at $1,860.60, below the deposit threshold.
- Usable floor on a 30 foot coach: roughly 190 to 230 square feet with slides
- Order 10 percent extra material for cuts, waste and pattern alignment
- Furniture removal and reinstallation: typically 8 to 12 hours combined
- Subfloor patching: add 6 to 10 hours per 12 square feet of rotted deck
- Body and paint labor: $210 per hour, with tax applied to material only
- A 50 percent deposit is collected on any authorized job above $2,000
Questions
Frequently asked questions
How long will my coach be in the shop for new flooring?
A single room or one slide floor is usually 3 to 5 business days. A full coach floor on a 30 to 34 foot unit runs 6 to 15 business days. The schedule stretches for two reasons. The first is subfloor repair, which is only visible after demolition and can add several days if a slide corner is involved. The second is material lead time, since plank in a specific color often has to be ordered. We give you a working schedule at authorization and update it in writing the same day anything changes, rather than letting you find out at pickup.
Do you have to take out the furniture?
Yes, for any floor that runs under it. The dinette, sofa or theater seating, bed platform and toilet all come out, along with base trim and often the entry step trim. Flooring cut around furniture looks acceptable for about a year, until the furniture moves or gets replaced and you are left with a bare patch and a visible cut line. On a 30 foot coach removal and reinstallation together is typically 8 to 12 hours. We photograph and bag hardware by location so everything goes back where it belongs.
What happens if you find rot under my floor?
We stop, photograph it, measure the extent and call you before doing anything else. Rot is not something we absorb into the original quote, and it is also not something we can predict accurately before the old covering is off. A 12 square foot patch typically adds 6 to 10 hours at $210 per hour, which is $1,260 to $2,100 plus decking material. A rotted slide floor is larger and gets quoted separately after the room is out. You will also get our read on the source, because patching the deck without fixing the leak above it just resets the clock.
Is vinyl plank or laminate better in an RV?
Vinyl plank, in almost every case. Rigid core plank is waterproof at the plank, weighs roughly 1.5 pounds per square foot in 5mm, and tolerates the flex that comes with a chassis that twists. Laminate has a fiberboard core that swells permanently once water reaches it, weighs closer to 2.4 pounds per square foot in 12mm, and it clicks and creaks over a deck that moves. On a 210 square foot coach that difference is about 180 pounds of cargo capacity. Laminate makes sense in a house. It rarely makes sense in a coach.
Does the new floor go under the slide rooms?
It should. Stopping the floor at the slide opening leaves a visible edge, a dirt trap and a lip that catches feet, and it changes what the slide seal wipes across. The correct method is to run the rooms out, floor the exposed main deck, then cycle each room part way in to lay the covered area and back out to finish the edge. That adds hours to the job. It is also the difference between a floor that looks factory and one that looks like a shortcut every time the room comes in.
Can I keep the carpet in the bedroom and only redo the living area?
Yes, and plenty of owners do exactly that. The living area and galley take the traffic and the spills, and they are where new flooring changes how the coach feels. The bedroom is the least abused surface in most coaches. The one thing to plan is the transition at the bedroom door, which needs a proper trim piece rather than a strip of edge molding, because the height difference between carpet with pad and 5mm plank is usually noticeable. We scribe that transition to the actual door opening so it does not lift.
Will a new floor add much weight?
It depends entirely on what you pick, and it is worth doing the arithmetic before you order. Two hundred and ten square feet of 5mm rigid core plank is about 315 pounds. The same area in 12mm laminate with an attached pad is close to 500 pounds. Sheet vinyl is under 100 pounds. The old carpet and pad you are removing is roughly 100 to 150 pounds, so a plank floor is often a net gain of 150 to 200 pounds against carpet. On a trailer with 1,400 pounds of cargo capacity that is worth knowing in advance.
Why did my last floor gap at the walls after one summer?
Two likely causes, and often both at once. The first is adhesive that was not rated for the temperature a closed coach reaches in summer. Standard flooring adhesive softens well below what a floor deck sees under Southern California sun, and the plank edges creep toward the warm side. The second is expansion gap that was either too tight, so the floor peaked and then relaxed unevenly, or laid out without accounting for slide openings and toe kicks. We use adhesives rated for elevated service temperature and plan the perimeter gap around the coach rather than off a straight wall.
Standard on every job
What is included
These are not upgrades. They are how the work is run on every vehicle that comes through the building.
Full teardown where it is needed
We do not estimate through a closed panel. If the damage path runs behind trim or skin, we open it and document what is actually there.
Written, itemized scope
Parts, labor hours, and materials listed separately against the posted rate, so every line is something you can question.
Direct carrier communication
We talk to the adjuster so you are not relaying technical detail between two parties who both expect you to already understand it.
Supplement handling
When teardown finds more than the original inspection, we document and submit the supplement rather than absorbing it into a vague overage.
Correct repair sequence
Structural before cosmetic, every time. A straight body over a bent frame is a repair that fails its second life.
Systems tested under load
Electrical, plumbing, generator, and climate systems are run and verified before delivery, not just reconnected and assumed good.
Photo documentation throughout
Before, during, and after. Useful for your records, and decisive if a claim is ever revisited.
Delivery walkthrough
We go over what was done, what was replaced, and what to watch, in person, with the vehicle in front of you.
How the work runs
Our six step repair process
The same sequence on every vehicle, whether it is a single coach or a fleet of box trucks.
- 01
Assessment and documentation
We put the vehicle on the floor, pull panels where we need to see behind them, and photograph everything. Hidden damage found now is damage that does not become a supplement argument later.
- 02
Written estimate
You get a line by line estimate with parts, labor hours, materials, and the posted rate applied to each. Nothing is bundled into a single number you cannot check.
- 03
Carrier coordination
If a claim is involved we deal with the adjuster directly, submit the documentation, and handle supplements when teardown reveals more than the first inspection showed.
- 04
Authorization and scheduling
Once the scope is approved we confirm the deposit, order parts, and give you a realistic slot. Special order parts drive the timeline more often than labor does.
- 05
Repair
Structural first, then body, then paint, then systems and interior. The sequence is not negotiable because each stage has to be right before the next one covers it up.
- 06
Quality check and delivery
Multi point inspection, systems tested under load, paint inspected under corrected lighting, and a walkthrough with you before the vehicle leaves.
Keep reading
Related pages
Related services
Vehicles we repair
Talk to a repair specialist today
Tell us what happened and we will tell you what the repair actually involves, what it costs, and how long it takes. We work directly with every major carrier and serve Westminster owners and fleets from our 35,000 square foot facility.
Posted labor rates are published on our prices page. Diagnostic and systems assessment fees are credited against an authorized repair.