Custom Fabrication
RV Welding and Metal Fabrication for Trailers and Coaches
In short
We repair cracked frames, reinforce weak structure, and build replacement parts that nobody sells anymore, in mild steel, aluminum, or stainless. Jobs run roughly $500 for a small duplicated bracket to $20,000 and beyond for full frame reinforcement with disassembly. Fit up time, not welding time, is what usually decides the price.
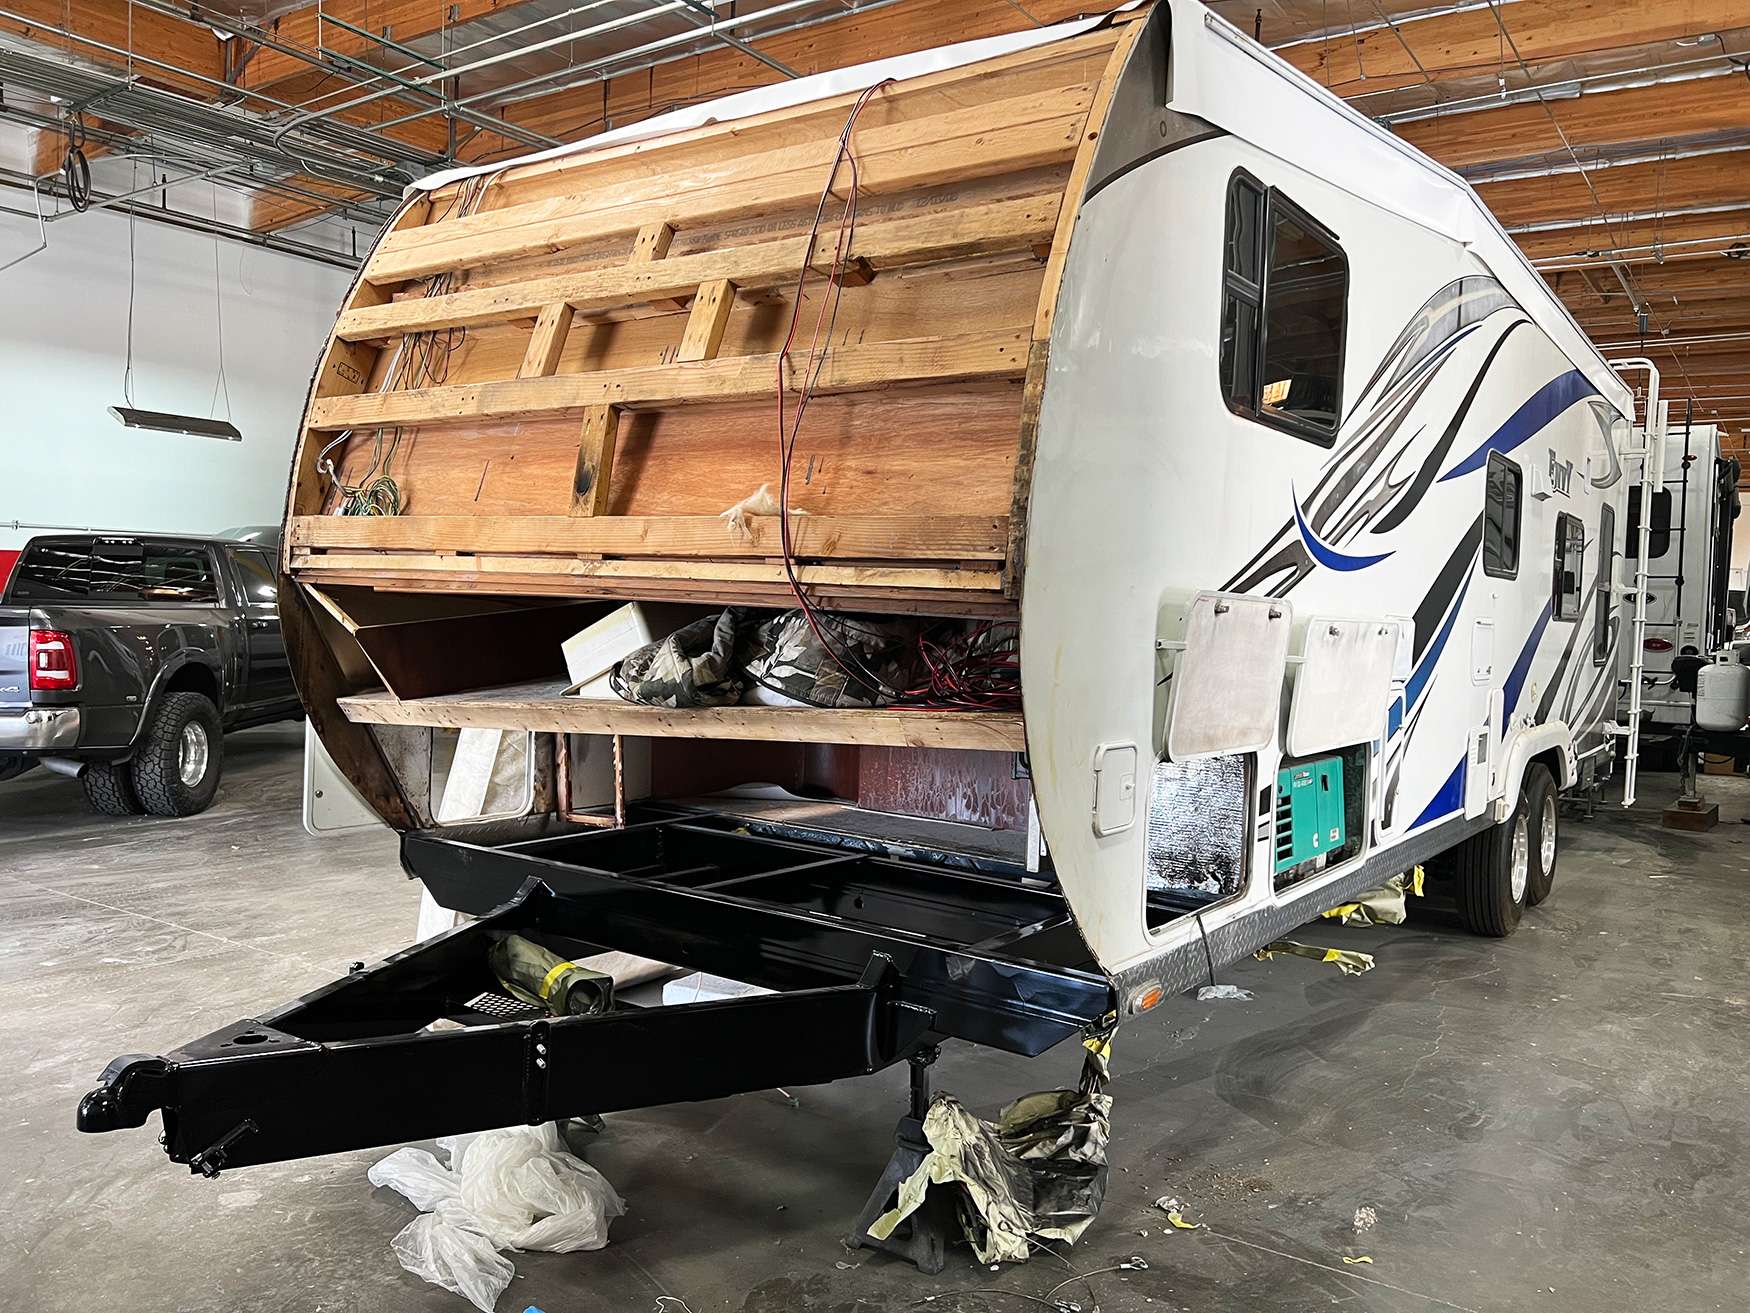
RV welding and metal fabrication covers a wide spread of work, from a hairline crack at a spring hanger to a complete rebuild of a trailer's rear frame section. Owners in Westminster bring us broken brackets with no part number, box truck door frames that got peeled open on a loading dock, and travel trailers whose A frames have been quietly cracking for two years. The common thread is that a catalog cannot solve any of it.
Steel or Aluminum, and What That Changes
Process follows material, and material follows the job. Mild steel gets MIG for anything structural because MIG is fast, penetrates well, and can be run in awkward positions under a chassis. It gets TIG when the piece is thin, when the weld will be visible on a finished part, or when heat control matters more than speed. Steel is forgiving, cheap, strong, and simple for the next shop to repair in ten years, which is a real advantage nobody talks about.
Aluminum is a different animal. It carries a tough oxide skin that melts far hotter than the metal beneath it, so every joint gets cleaned mechanically immediately before welding or the weld traps contamination and turns porous. It also conducts heat away fast, so thin sections either need more power than you expect or they warp badly. TIG gives the control that thin aluminum needs; a spool driven MIG setup is faster on thicker sections and common in trailer frame work.
The tradeoff owners feel is cost. The same bracket in aluminum takes more prep, more careful heat management, and more time to get right, so it bills more hours than the steel version even though the material is lighter. Aluminum also loses meaningful strength in the heat affected zone beside every weld, which means a good aluminum design uses bigger sections and keeps welds away from the highest stress points.
- MIG on structural steel: fast, strong, workable overhead and under a chassis
- TIG on thin material, aluminum, stainless, and anything cosmetic
- Aluminum requires mechanical cleaning right before the arc strikes
- Aluminum welds are weaker than the parent metal around the joint
- Stainless resists corrosion but work hardens and galls on dry threads
- The metal already in the vehicle usually decides the metal we add
Frame Flex Cracks and Where They Start
Frames crack in the same places over and over, and once you know the list you can inspect your own. Look at suspension hanger welds, especially the forward equalizer hanger on a tandem axle trailer. Look at the toe of any factory weld where a cross member meets a main rail. Look at every hole somebody drilled through a rail flange to route wiring or plumbing. Look where a slide room mechanism ties into the frame on a coach, and look at outriggers carrying body overhang.
All of those are stress risers, meaning points where load concentrates instead of spreading. A frame that flexes normally over its whole length will crack at the one spot where flexing is prevented or where a sharp corner concentrates stress. That is why cracks appear at square corners, at weld toes, and at drilled holes rather than in the middle of a clean rail. It is also why cracks propagate along a predictable line once they start.
Catching them early matters enormously to what the repair costs. A three inch crack found at a hanger is a straightforward stop drill, vee out, weld, and plate job. The same crack ignored for two more seasons runs across the rail, deforms the hanger geometry, throws the axle alignment out, and turns into a section replacement with the axle and brakes off the trailer. The first version is a day. The second is a week.
Trailer Frame Repair and Reinforcement
Trailer frame repair follows a fixed sequence. We support the frame properly so nothing settles while metal is open, remove or shield whatever is in the way, then drill stop holes at both crack tips so the crack cannot keep running. The crack gets veed out so the weld reaches full depth rather than bridging across the surface, then welded out, then plated where the load demands it. Plates get radiused corners, because a square plate corner welded to a frame is just a new crack starting point.
Reinforcement is a separate decision from repair. Plenty of trailers crack because the original frame was built to a price and the vehicle has been loaded to its limit since it left the factory. In those cases we talk about adding material where the design was thin: a longer plate under the hanger area, an additional cross member, or a section of channel sistered along a rail. That costs more than a spot repair and it stops the same crack from coming back in eighteen months.
We are also direct about when a frame is not worth repairing. If the rails are rusted through in section rather than cracked, plating over that is a cover, not a fix. If the trailer's floor, walls, and axles are all at the end of their service life, a five thousand dollar frame job is money spent on a vehicle that will need another five thousand next year. We would rather tell you that at the estimate.
- Frame supported and load removed before any cutting or welding
- Stop holes drilled at both crack tips first, every time
- Cracks veed out for full depth penetration, not surface bridged
- Fish plates sized to move load past the repair, corners radiused
- Batteries disconnected and ground clamped within inches of the weld
- Alignment and axle geometry checked after structural work
Door Frames, Steps, and Duplicated Brackets
Cargo trailer and box truck rear door frames take a beating that nobody plans for. A roll up door track that got caught on a dock, a swing door frame bent from being backed into a post, or a header sagging because the corner posts have rusted at the floor line are all routine here. The repair is usually a combination of straightening what can be straightened, replacing sections that cannot, and getting the opening square again so the door actually seals when it closes.
Step assemblies are the most common single item we rebuild. Manual and electric entry steps live in road spray, carry the full weight of every person who enters, and mount to a floor edge that is often the softest structure on the vehicle. When a step assembly fails, the mount usually failed first. We repair or rebuild the assembly and then address whatever it bolts to, because reattaching a good step to a rotten floor edge just delays the same phone call.
Bracket duplication is where a lot of odd jobs land. Bring us the broken piece, even in fragments, and we measure hole centers, bend angles, and material thickness, then check those numbers against the mounting points still on the vehicle. A fabricated version of a factory casting will look different from the original. It will fit and function the same, and we show you what that visual difference will be before you approve anything.
Fit Up Time Is the Real Cost Driver
Owners consistently expect the welding to be the expensive part. It almost never is. On a typical fabricated assembly, actual arc time might be twenty minutes out of a twelve hour job. The hours go to measuring, building a jig or fixture to hold the pieces where they need to be, cutting and grinding to fit, tacking, checking, correcting, and checking again. Every one of those steps is what makes the finished part land where it is supposed to.
The reason fit up runs long on RVs specifically is that no RV is square. Vehicles flex, settle, get hit, and get repaired by previous owners with whatever was in the garage. A bracket that is a perfect copy of the factory drawing will not bolt to a frame that has been sitting twisted for a decade. So we build to the vehicle in front of us, which means measuring the vehicle rather than trusting symmetry, and it means correcting as we go.
This is also why we quote ranges rather than single numbers on custom work, and why the deposit exists. Once material is cut to a specific vehicle's dimensions it cannot go back on a shelf. On anything above $2,000 we take a 50 percent deposit before we start cutting, and we lay out the hours by bucket on the estimate so you can see where they go.
- Design and measurement: pattern work and checking against the actual vehicle
- Material: tube, plate, bar, fasteners, and coating supplies
- Fit up: jigging, clamping, tacking, correcting, rechecking
- Welding: usually the shortest line item on the estimate
- Finish: clean to bare metal, prime, coat, seal, reinstall
- Deposit: 50 percent on any job above $2,000
Inspection, Galvanic Corrosion, and Final Finish
Every structural weld gets visually inspected after the slag and spatter come off, which is the point of cleaning them properly rather than coating over a rough bead. We look for undercut at the toes, lack of fusion at the root, porosity, and crater cracks at stops. On critical repairs we grind and re run anything that does not look right, because a weld that is only pretty on the outside is worse than no repair at all. Where a job justifies it, dye penetrant makes surface cracks visible.
Galvanic corrosion is the quiet killer on mixed metal RVs. Put aluminum in direct contact with steel with any moisture present and you have built a small battery, and the aluminum is the metal that dissolves. It shows up as white powder and swelling around every fastener on eight year old factory aluminum brackets. We isolate those joints with barrier coatings on the mating faces, isolation washers, and fastener materials chosen for the pairing rather than for what is in the bin.
Then everything gets coated. Bare cut and welded steel shows surface rust within days in Southern California coastal air, and once rust gets under a coating it spreads sideways from the edge. Parts we build get cleaned to bare metal, treated, primed, and powder coated or painted. Repairs done on the vehicle get the same treatment in place, including the inside of a rail where we can reach it, because a frame repair coated only on the outside rusts from within.
Questions
Frequently asked questions
Can a cracked trailer frame be welded, or does it need replacing?
Most cracks are repairable, and the earlier they are found the cheaper that is. A crack gets stop holes drilled at both tips so it cannot keep running, gets veed out so the weld reaches full depth, gets welded, and then gets plated where the load path demands it. What is not repairable is rot. If the rail is rusted through in section rather than cracked, plating over that is a cover rather than a repair and we will tell you so. The other consideration is the rest of the vehicle. Spending five thousand on a frame under a trailer with soft floors and worn axles is rarely money well spent.
Why does aluminum work cost more than the same job in steel?
Time, mostly. Aluminum grows an oxide skin that melts far hotter than the metal underneath, so every joint has to be mechanically cleaned immediately before welding or the weld traps contamination and goes porous. It also pulls heat away fast, so thin sections warp if the heat is not managed carefully, and TIG work on thin aluminum is simply slower than pulling a MIG trigger on steel. On top of that, aluminum loses strength in the heat affected zone beside every weld, so the design usually needs heavier sections and more careful joint placement. The material costs more too, but labor is the bigger share of the difference.
Can you copy a bracket if I bring in the broken one?
Yes, and bring every fragment even if some look useless, because hole spacing or a bend angle often survives on only one piece. We clean the sample, measure hole centers, bend angles, and material thickness, then verify all of it against the mounting points still on the vehicle. That last step matters because parts rarely fail alone. If the mount holes are elongated or the structure behind them has gone soft, an exact copy of the old bracket will fail the same way. A welded fabricated version of a factory casting will look different from the original, and we show you that difference before you approve the work.
Where do frame cracks usually start?
At stress risers, which are the places where load concentrates instead of spreading out. The usual suspects are suspension hanger welds, particularly the forward equalizer hanger on a tandem axle trailer; the toe of any factory weld where a cross member meets a main rail; any hole drilled through a rail flange to route wiring or plumbing; slide room mechanism mounts on a coach; and outriggers carrying body overhang. Cracks appear at square corners, weld toes, and drilled holes rather than in the middle of a clean rail. If you crawl under your trailer once a year with a light and check those specific spots, you will catch most problems while they are still cheap.
How do you keep aluminum and steel from corroding where they touch?
By never letting them touch directly. Aluminum in contact with steel in the presence of moisture forms a small galvanic cell, and the aluminum is the metal that gives up material. You see the result as white powder and swelling around fasteners on older factory aluminum brackets. We isolate those joints with a barrier coating on both mating faces, isolation washers or sleeves where a fastener passes through, and fastener materials chosen for the specific pairing rather than for whatever is in the bin. On coastal Southern California vehicles this is not optional detailing, it is the difference between an eight year part and a twenty year part.
What does a typical welding job cost here?
Here is a real one. A cracked spring hanger on a tandem axle trailer: 2.5 hours of mechanical labor at $260 to support the frame and pull the axle, which is $650; then 6 hours of fabrication and welding at $210, which is $1,260; then 1.5 hours at $210 to clean, prime, and coat, which is $315. Labor totals $2,225. Steel plate and a replacement hanger run about $180, which carries 35 percent markup to $243, and with 7.75 percent tax on materials that is $261.83. Total is about $2,486.83, with a 50 percent deposit of roughly $1,243 to start. At the low end, a small bracket duplicated from a broken sample runs about two hours at $210 plus roughly $86 in marked up and taxed material, so a little over $500.
Do you fix cargo trailer and box truck door frames?
Regularly. The usual jobs are roll up door tracks bent from catching a dock, swing door frames deformed from backing into something, header sag from corner posts rusting out at the floor line, and hinge mounts torn loose. The repair is a mix of straightening what can be straightened, cutting out and replacing sections that cannot, and squaring the opening so the door seals when it closes. Squaring the opening is the part that takes the hours, because a frame that is out by a quarter inch will still leak and still bind the latch. We check the door operation before we coat anything.
How do you know a weld is actually good?
Cleaning and looking, first. Every structural weld gets the slag and spatter removed and then a real visual inspection: undercut at the toes, lack of fusion at the root, porosity in the bead, crater cracks where the arc stopped. Anything that does not look right gets ground out and re run rather than coated over. On critical repairs we use dye penetrant, which draws surface cracks out as a visible line and catches things the eye alone will miss on a rough surface. We also inspect the parent metal around the repair, since a good weld beside a section of thinned or rusted rail is not a good repair.
Standard on every job
What is included
These are not upgrades. They are how the work is run on every vehicle that comes through the building.
Full teardown where it is needed
We do not estimate through a closed panel. If the damage path runs behind trim or skin, we open it and document what is actually there.
Written, itemized scope
Parts, labor hours, and materials listed separately against the posted rate, so every line is something you can question.
Direct carrier communication
We talk to the adjuster so you are not relaying technical detail between two parties who both expect you to already understand it.
Supplement handling
When teardown finds more than the original inspection, we document and submit the supplement rather than absorbing it into a vague overage.
Correct repair sequence
Structural before cosmetic, every time. A straight body over a bent frame is a repair that fails its second life.
Systems tested under load
Electrical, plumbing, generator, and climate systems are run and verified before delivery, not just reconnected and assumed good.
Photo documentation throughout
Before, during, and after. Useful for your records, and decisive if a claim is ever revisited.
Delivery walkthrough
We go over what was done, what was replaced, and what to watch, in person, with the vehicle in front of you.
How the work runs
Our six step repair process
The same sequence on every vehicle, whether it is a single coach or a fleet of box trucks.
- 01
Assessment and documentation
We put the vehicle on the floor, pull panels where we need to see behind them, and photograph everything. Hidden damage found now is damage that does not become a supplement argument later.
- 02
Written estimate
You get a line by line estimate with parts, labor hours, materials, and the posted rate applied to each. Nothing is bundled into a single number you cannot check.
- 03
Carrier coordination
If a claim is involved we deal with the adjuster directly, submit the documentation, and handle supplements when teardown reveals more than the first inspection showed.
- 04
Authorization and scheduling
Once the scope is approved we confirm the deposit, order parts, and give you a realistic slot. Special order parts drive the timeline more often than labor does.
- 05
Repair
Structural first, then body, then paint, then systems and interior. The sequence is not negotiable because each stage has to be right before the next one covers it up.
- 06
Quality check and delivery
Multi point inspection, systems tested under load, paint inspected under corrected lighting, and a walkthrough with you before the vehicle leaves.
Keep reading
Related pages
Related services
Vehicles we repair
Talk to a repair specialist today
Tell us what happened and we will tell you what the repair actually involves, what it costs, and how long it takes. We work directly with every major carrier and serve Westminster owners and fleets from our 35,000 square foot facility.
Posted labor rates are published on our prices page. Diagnostic and systems assessment fees are credited against an authorized repair.