Services
Custom RV Fabrication for Orange County Owners
In short
Custom fabrication is what happens when the part you need is not sold anymore, was never sold at all, or has to carry a load the factory never planned for. We cut, weld, and finish steel, aluminum, and stainless in house for Westminster owners. Most jobs run between $500 and $20,000 depending on design time and how much fit up the piece needs.
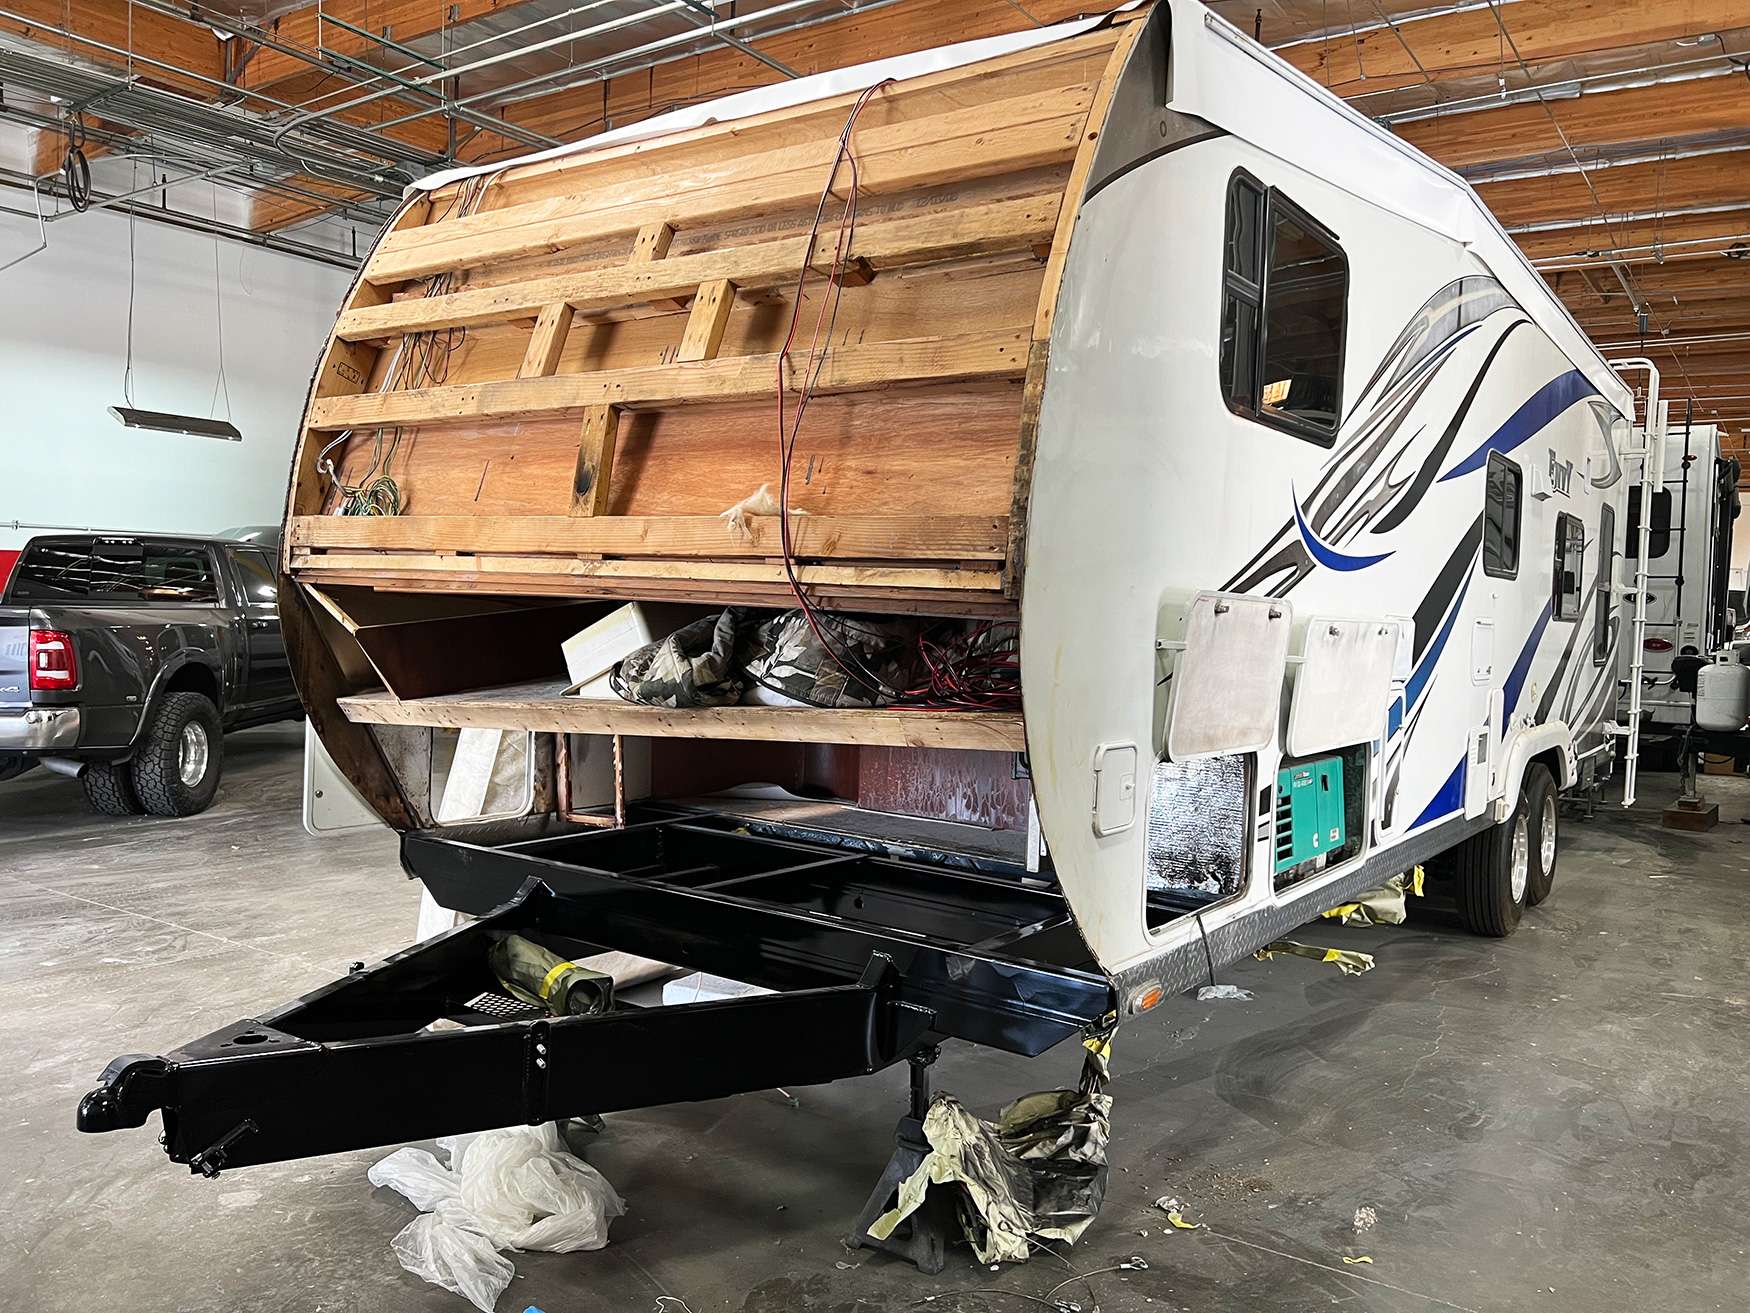
We handle the custom RV fabrication Orange County owners come looking for when a bracket has snapped, a frame has cracked, or a rack has to hold something the coach was never designed to carry. Some of it is repair work on structure that already exists. Some of it is a part designed from scratch because the supplier stopped building it years ago. Either way the job starts with measuring what is actually there, not with a catalog.
When the Original Part No Longer Exists
A lot of what rolls through the door is not broken in a way a parts counter can solve. The company that built the step assembly, the holding tank cradle, or the entry door frame either stopped making that version or stopped existing. On a coach built in the early 2000s that is normal rather than unusual. At that point you have three options: a universal substitute that almost fits, a used piece pulled off a salvage unit, or a part made to match the original. We do the third one.
Duplication starts with the broken sample. We clean it, measure every hole center, bend angle, and material thickness, then check all of that against the mounting points still on the vehicle. Parts rarely fail alone. A bracket that cracked usually cracked because something else moved first. If the mount holes are elongated or the floor under the bracket has gone soft, copying the old part exactly just rebuilds the same failure on a slower timeline.
There are jobs we will tell you to walk away from. If a twenty year old trailer needs four thousand dollars of frame work and the floor, walls, and axles are all at the end of their life, that money buys very little. We would rather say so during the estimate than halfway through a teardown when you are already committed.
Picking the Right Metal for the Job
Mild steel is the default for structure. It is strong, cheap, forgiving to weld, easy to bend, and simple to repair five years from now in any shop in the country. Its one real weakness is that it rusts the moment you cut or grind it, so every steel part we build leaves here coated. For bumpers, hitch structure, frame repair, and anything that carries a serious load, steel is usually the honest answer even when an owner asks for aluminum.
Aluminum earns its place when weight matters or when it is bolting to an aluminum structure already. A roof rack, a lightweight cargo tray, or a repair to an aluminum framed trailer are all good candidates. The tradeoffs are real, though. Aluminum loses strength in the heat affected zone around every weld, it fatigues rather than bending and holding, and it costs more in both material and labor because the welding is slower and the prep is fussier.
Stainless shows up on anything that stays wet or gets salt on it: exhaust shields, tank straps, exterior hardware, marine style fittings, and trim that has to stay bright without paint. It resists corrosion far better than coated steel but it work hardens, it galls when threaded fasteners are run dry, and the material itself is several times the cost of mild steel. We use it where it pays for itself, not everywhere.
- Mild steel: best strength for the money, must be coated, easy to repair later
- Aluminum: roughly one third the weight, weaker near the welds, costs more in labor
- Stainless: best corrosion resistance, highest material cost, needs anti seize on threads
- Never bolt bare aluminum straight to bare steel without an isolator
- Match the metal to the load path, not to the look you want
MIG and TIG Process Selection
MIG is the workhorse for structural steel. It lays metal down fast, it works well on material from about eighteen gauge up through half inch plate, and it can be run out of position under a chassis where nobody can get a clean two handed setup. For frame plating, bumper structure, and hitch work, MIG is faster and just as strong when the joint prep and penetration are right. Faster process time means fewer billed hours, which you see on the invoice.
TIG comes out for thin material, for aluminum, for stainless, and for anything that will be seen. It gives the welder control of heat and filler independently, which is what you need when the base metal is a sixteenth of an inch of aluminum and blowing through means starting over. It is slower. A joint that takes ten minutes in MIG can take forty in TIG, and that time is real money at the shop rate.
We pick the process from the metal, the thickness, the position, and whether the weld is cosmetic. When a customer asks for TIG on a steel bumper because it looks nicer in photographs, we will quote it, but we will also tell you what the extra hours buy and what they do not. On a part that gets powder coated black and hides behind a bumper cover, they buy very little.
Frame and Chassis Repair on a Motorhome
Motorhome chassis rails crack in predictable places. Look at the outriggers that carry the body overhang, the mounts where a slide room mechanism ties into the frame, the area around suspension hangers, and anywhere someone drilled a hole through a rail flange to route a wire. Every one of those is a stress riser. Cracks almost always start at a hole, a sharp corner, or the toe of an old weld, and they grow along the same line every time.
The repair is not just closing the crack. We drill stop holes at the crack tips so it cannot keep running, vee out the crack for penetration, weld it, then plate the area with a fish plate that spreads load past the repair instead of concentrating it at the ends. Plate corners get radiused, never left square, because a square corner on a fish plate is just a new crack starting point welded onto the frame.
There are limits we hold to. We do not weld across the bottom flange of a chassis rail where the tension load is highest unless the repair is engineered to do it. We do not heat and straighten a rail that has been kinked hard. And if the rail is rusted through in section rather than cracked, plating over rot is not a repair, it is a cover. We will tell you that plainly.
- Stop holes drilled at both crack tips before any welding starts
- Crack veed out so the weld reaches full depth, not just bridged on top
- Fish plates with radiused corners, sized to move load past the repair
- Wiring, air lines, and fuel lines pulled clear or shielded before heat
- Batteries disconnected and the ground clamped close to the weld
- Coating restored inside and out once the metal has cooled
Tongue, Coupler, and A Frame Work on Trailers
The A frame on a travel trailer takes abuse that the rest of the frame never sees. It carries the tongue jack, the battery box, two propane tanks, sometimes a generator, and all of the shock load from hitching and unhitching. Common failures are cracks where the A frame members meet the main rails, elongated coupler bolt holes, a coupler latch that no longer clamps tight on the ball, and jack mounts that have torn loose from repeated cranking against a stuck jack.
Coupler replacement is straightforward when the A frame under it is sound. We cut the old coupler off, square the new one to the trailer centerline, tack, check the fit on an actual ball, then weld it out and coat it. What takes the time is verifying the frame it lands on. A coupler welded to a member that is already cracked is a failure waiting for the first hard stop.
Extending or shortening a tongue changes how the trailer tows, and owners underestimate how much. Move the coupler forward and you change tongue weight as a percentage of total weight, you change hitch leverage, and you change how the trailer reacts to a crosswind or a passing truck. Below roughly ten percent tongue weight most trailers become prone to sway, and sway is what bends A frames in the first place. We will do the modification, but we work the tongue weight numbers first rather than cutting to whatever length happens to make a bike rack clear the spare tire.
Mounting Into a Wall That Is Mostly Foam
An RV sidewall is not a truck bed. On most laminated coaches you have a thin exterior skin, roughly one inch of foam block, a light framing grid of aluminum tube or wood, and a thin interior panel, all glued together. The panel is strong in shear across its whole face and almost worthless in point loading. A lag screw into that sandwich holds until the first hard bump, then it works the hole oval and starts letting water in behind it.
So the question on any mounted item is never where does it look right, it is where does the load actually go. A ladder, an awning arm, a bike rack, a satellite mount, or a flag pole all need to tie into something real: a wall stud, a floor edge beam, the roof frame, or a steel backer we add on purpose. We find framing before we drill, using a combination of measurement from known points and careful probing rather than guessing.
Where nothing structural exists in the right spot, we build the structure. That usually means a backing plate spread across several framing members inside the wall, or a bracket that reaches down to the chassis instead of relying on the wall at all. Every fastener that penetrates the exterior gets sealed properly, because a perfectly strong mount that leaks will still rot the wall out from the inside in two seasons.
- Locate real framing before drilling; never trust a skin fastener to carry load
- Spread load across multiple members with an interior backing plate
- Reach down to the chassis or floor beam for anything carrying real weight
- Use sealant rated for the substrate, not whatever tube is on the shelf
- Keep dissimilar metals isolated where the fastener passes through the skin
- Retorque and reinspect mounts after the first few trips
Corrosion Protection and Final Finish
Bare steel does not last in Southern California coastal air. Cut, ground, or welded steel will show surface rust within days if it sits uncoated, and once rust gets under a coating it spreads sideways from the edge. So finish is not decoration on a fabricated part, it is half the service life. Every steel piece that leaves here gets cleaned to bare metal, treated, primed, and topcoated or powder coated before it ever goes back on the vehicle.
Powder coat is the tougher finish for brackets, racks, bumpers, and anything that gets kicked, loaded, and scraped. It goes on thick, cures hard, and resists chipping far better than a wet coat. Its limits are that the part has to fit an oven, it has to tolerate the cure temperature, and repairing a chip later means touching up with paint anyway. Wet paint is the right call for large weldments, for parts already installed, and when we need to match an existing body color.
Where aluminum meets steel we isolate. A stainless bolt through an aluminum bracket into a steel frame is a small battery, and the aluminum is the part that dissolves. Isolation washers, a barrier coating on the mating faces, and the right fastener material stop it. Skipping that step is why so many factory aluminum brackets are chalky and swollen around every bolt hole by year eight.
One Roof, and How a Custom Job Gets Quoted
The OCRV Center building is roughly 35,000 square feet, and body, paint, and fabrication all live in it. That matters more than it sounds. A custom job that has to move between a welding shop, a body shop, and a paint booth in three different places picks up transport time, scheduling gaps, and finger pointing when something does not line up. Here the fabricator and the painter walk over to the same vehicle. Fit issues get solved in an afternoon instead of a second appointment three weeks out.
A custom quote has five buckets, and we break them out so you can see where the money goes. Design and measurement time, material, fit up, welding, and finish. Body and paint labor is $210 per hour, mechanical labor is $260 per hour where the job requires pulling driveline, suspension, or chassis components, and diagnostic labor is $285 per hour and is credited against an authorized repair. Parts and material carry 100 percent markup at or under $100 and 35 percent above $100.
Anything over $2,000 takes a 50 percent deposit before we start cutting, because custom material and custom time cannot be returned to a shelf. Sales tax at 7.75 percent applies to parts and materials; labor is not taxed in California. The single largest variable on almost every custom job is fit up, meaning the hours spent holding, clamping, measuring, and re measuring before the first real weld. That is where a job goes from the bottom of a range to the top.
- Design and measurement: pattern making, sketching, checking against the vehicle
- Material: tube, plate, bar, fasteners, and coating supplies
- Fit up: jigging, clamping, tacking, and correcting for a vehicle that is not square
- Welding: the actual joining time, which is often the smallest bucket
- Finish: blast or sand, prime, powder coat or paint, seal and reinstall
- Deposit of 50 percent on any job above $2,000
In this category
Services we perform
Custom Bumpers and Racks
We build and install rear bumpers, receiver structure, bike and cargo racks, ladders, spare tire carriers, and generator or propan...
Read moreWelding and Metal Fabrication
We repair cracked frames, reinforce weak structure, and build replacement parts that nobody sells anymore, in mild steel, aluminum...
Read moreWheelchair Lift Repair
We service platform and rotary wheelchair lifts on vans, coaches, and conversions: hydraulic power units and cylinders, electrical...
Read moreQuestions
Frequently asked questions
Can you make a part if all I have is the broken pieces?
Usually yes, and broken pieces are a better starting point than a photo. Bring everything, including the fragments that look useless, because hole spacing and bend angles often only survive on one of them. We clean the sample, measure it, and check those measurements against the mounting points still on the vehicle, since a part almost never fails without something else moving first. If the original was a casting or a stamping with complex curves, a welded fabricated version will look different from the factory piece even when it fits and functions identically. We will show you what that difference will be before you approve the work.
Do you weld aluminum, or only steel?
Both, plus stainless. Aluminum work is done with TIG or a spool driven MIG setup depending on thickness, and it requires much more prep than steel does. Aluminum grows a tough oxide layer that melts at a far higher temperature than the metal underneath, so every joint has to be cleaned mechanically right before welding or the weld traps contamination. Expect aluminum work to bill more hours than the same shape in steel. It is also worth knowing that aluminum loses a meaningful percentage of its strength in the heat affected zone next to every weld, so a good aluminum design uses larger sections and keeps welds away from the highest stress point.
Is it safe to weld on a motorhome chassis frame?
It is, when it is done with the right preparation and in the right places. We disconnect the batteries and any sensitive control modules, clamp the welding ground within inches of the joint so current does not travel through bearings or wiring, and move or shield fuel lines, air lines, and harnesses before any heat goes near them. What we will not do is weld across the bottom flange of a chassis rail in a high tension area without an engineered repair, or plate over metal that has rusted through in section rather than cracked. Plating over rot hides a problem instead of fixing it, and we will say so rather than take the job.
How do I know whether a rack can just bolt to my sidewall?
Almost never, if it carries real weight. A typical laminated sidewall is a thin outer skin, about an inch of foam, a light framing grid, and a thin inner panel. That construction is strong across its whole face and very weak at a single fastener. A rack bolted only to skin will hold for a while, then work the holes oval, crack the skin, and let water into the foam. What works is tying the load into something structural: framing members, the floor edge beam, the roof frame, or a steel backing plate we install that spreads the load across several members. We locate that structure before drilling anything.
What does a custom fabrication job actually cost?
The honest range across everything we build is about $500 to $20,000, which is wide because the work genuinely is. A small bracket duplicated from a broken sample might be two hours of shop time plus forty dollars of steel. A full trailer frame reinforcement with axle removal, plating, and refinishing can run past fifteen thousand. Labor is $210 per hour for body and fabrication work and $260 per hour for mechanical work that involves pulling suspension or driveline. Material carries 100 percent markup at or under $100 and 35 percent above that, plus 7.75 percent sales tax on parts. Labor is not taxed in California.
How long will a custom job take?
Small duplication work is often two to five business days. A bumper, rack, or tray build is typically one to three weeks. Frame and chassis repair depends heavily on what has to come off the vehicle first and can run three to six weeks when axles, tanks, or body panels are in the way. The two things that stretch a schedule most are material availability on odd sizes and finish time, since powder coat and paint both need cure time that cannot be rushed. We give a written date range when we write the estimate and we call you when something moves it.
Will new steel just rust out again in a few years?
Not if it is finished properly, and finishing is where most cheap fabrication fails. Bare cut or welded steel shows surface rust within days in coastal air here. Every steel part we build is cleaned back to bare metal, treated, primed, and then either powder coated or painted before it goes back on the vehicle, and weld areas on existing frames get coated inside and out once they cool. We also isolate aluminum from steel wherever they meet, because that pairing corrodes the aluminum quickly. A properly coated steel bracket that gets touched up when it chips will outlast most of the rest of the coach.
Do you charge to estimate a custom job?
Yes. Estimating custom work is real engineering time, not a walkaround, because we have to measure the vehicle, work out where load will actually go, and price material before a number means anything. Our RV systems assessment is $150 and it is credited against an authorized repair. Where diagnosis of a mechanical or electrical fault is part of the job, diagnostic labor is $285 per hour and is also credited against an authorized repair. If you approve the work, that money comes off the invoice. If you do not, you keep the measurements and the written scope and you are welcome to take them elsewhere.
Keep reading
Related pages
Other service areas
Vehicles we repair
Talk to a repair specialist today
Tell us what happened and we will tell you what the repair actually involves, what it costs, and how long it takes. We work directly with every major carrier and serve Westminster owners and fleets from our 35,000 square foot facility.
Posted labor rates are published on our prices page. Diagnostic and systems assessment fees are credited against an authorized repair.