Paint and Refinishing
RV Spot Paint Repair and Blending on Large Coaches
In short
RV spot repair and blending runs $500 to $5,000 or more depending on how large the blend zone has to be. At our Westminster shop a small scuff on a compartment door might be four to six hours, while a scraped sidewall with no natural break line can require blending twenty feet of adjacent surface. Blending means melting new clear into old clear, not painting a rectangle.
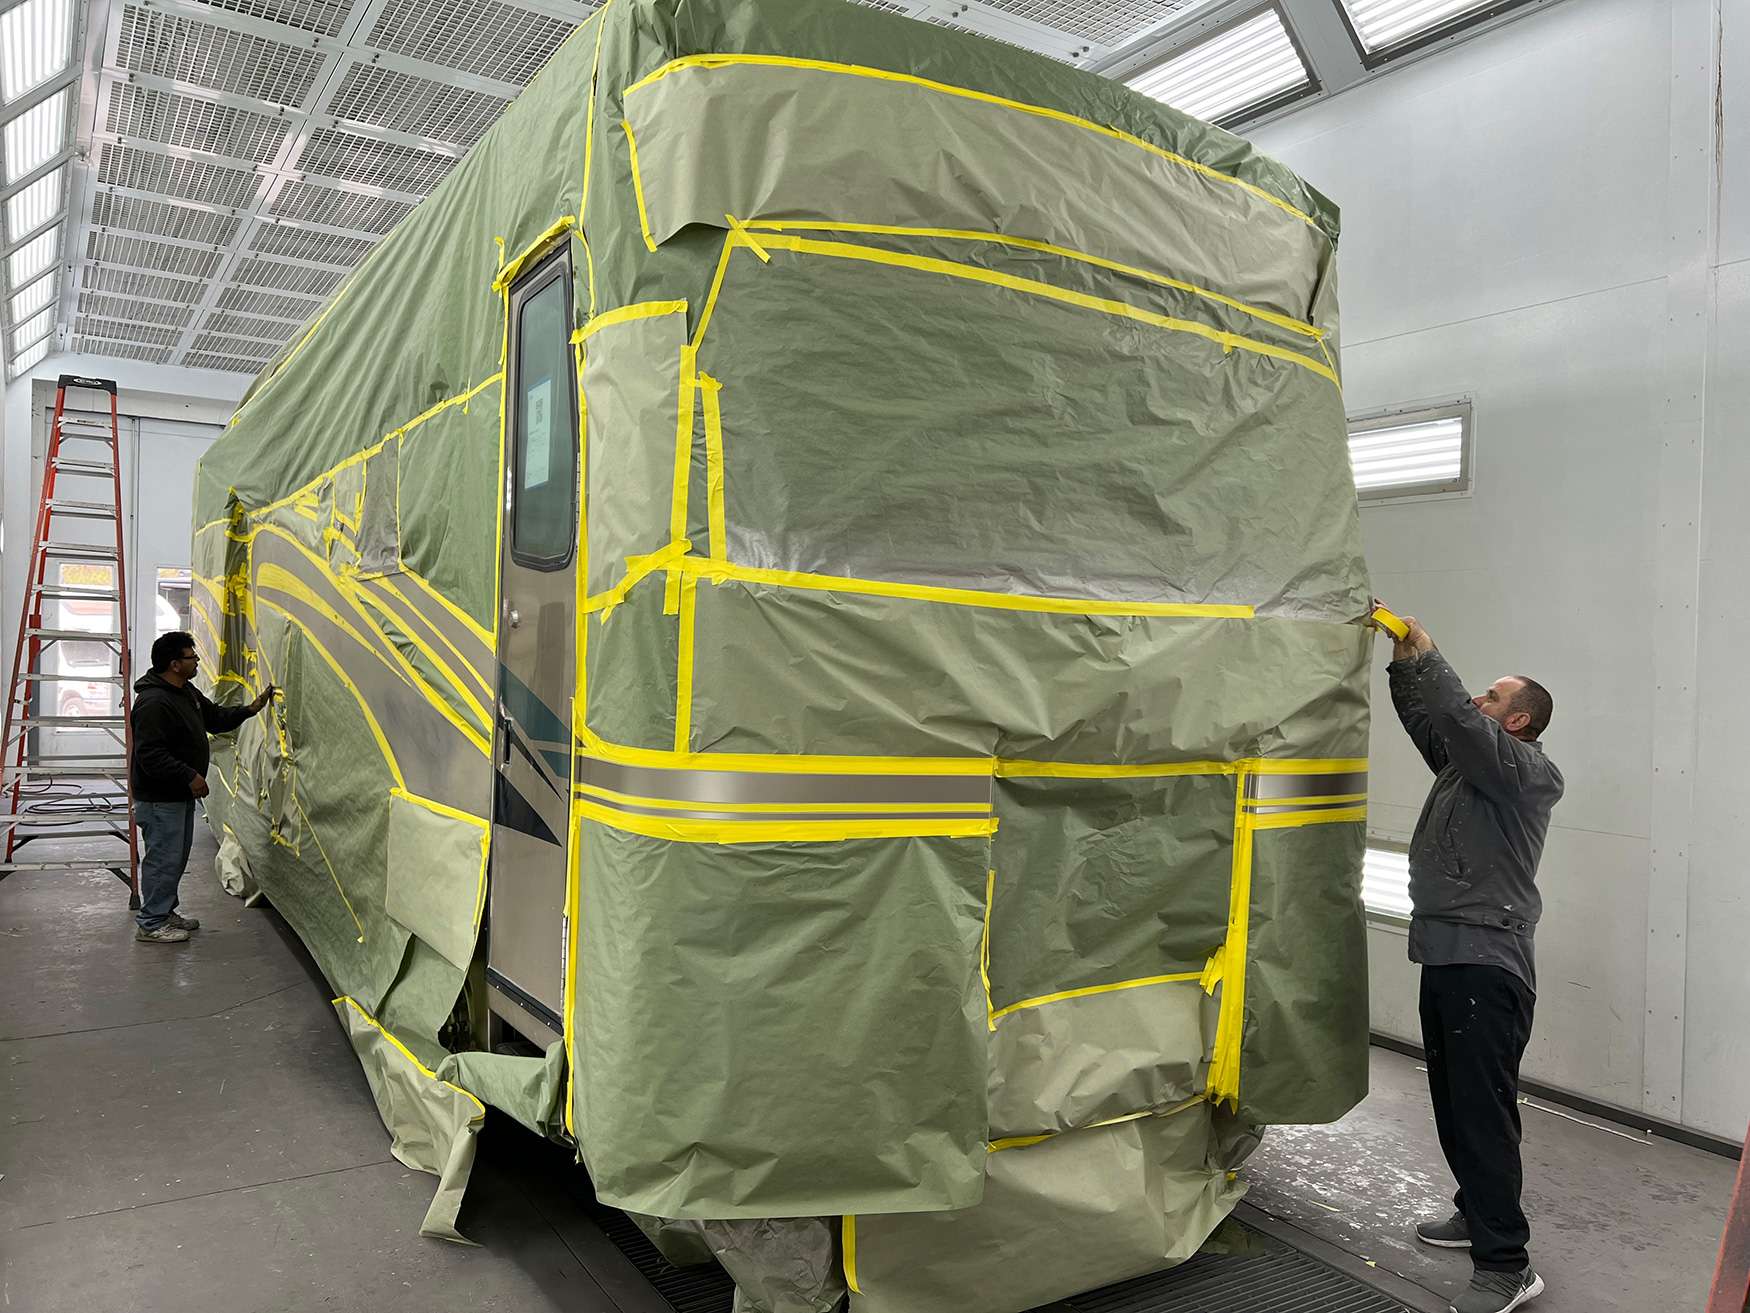
RV spot paint repair and blending is the difference between a repair you can find and one you cannot. The technique is straightforward to describe and hard to execute: apply new color to the damaged area, then fade the edge of that color into the surrounding panel and lock the whole thing under clear that melts into the existing clear. On the large flat sidewalls that Westminster owners bring us, the challenge is that there is rarely a body line to stop at.
What Blending Actually Means in the Booth
Blending is not feathering the edge of a repair and hoping. It is a controlled fade where the new base color is sprayed progressively thinner as it moves away from the repair, until it disappears into the existing color with no visible line. Then clear is applied over the repair and the fade zone together, and the leading edge of that clear is melted into the surrounding old clear with a blending solvent so there is no step you can feel with a fingernail.
The reason this works is that human eyes detect edges, not slight color differences. A repair that is two percent off in color but has no edge reads as invisible. A repair that is a perfect color match but stops at a hard tape line reads as a repair from thirty feet away. Every technique in the blending toolkit exists to eliminate edges, which is why the labor is in the fade zone rather than in the damaged spot itself.
Because clear has to be applied wet enough to flow into the existing surface, the blend zone always extends well past the color zone. A three inch scuff might have a twelve inch color blend and a thirty inch clear blend. That geometry is what drives the estimate, and it is why the size of the damage is a poor predictor of the price.
Why RV Sidewalls Have So Few Natural Break Lines
On a passenger car, a repair can be contained. A fender ends at a gap, a door ends at a gap, and blending into an adjacent panel is a defined amount of surface. An RV sidewall is a single continuous laminated skin that can run thirty feet with nothing but a rub rail and a couple of compartment doors interrupting it. There is no gap to hide the end of a blend, so the blend has to be big enough that the eye cannot resolve where it stopped.
This is the single biggest reason RV spot repairs cost more than car spot repairs for identical damage. A four inch gouge on a car door is a one panel repair. The same gouge in the middle of a coach sidewall means blending outward in every direction until you reach something that breaks the visual field: a compartment door edge, a graphic stripe, a window opening, or the transition to the front cap.
Existing graphics can work in your favor here. If your coach has a swept stripe running the length of the wall, we can often stop a blend at the top edge of that stripe and keep the affected area to a manageable size. When we quote a repair, one of the first things an estimator does is walk the wall looking for exactly these opportunities.
- Compartment door edges are the most useful natural stopping point
- Graphic stripes and two-tone breaks can contain a blend cleanly
- Window and slide openings interrupt the eye and end a blend zone
- Cap-to-sidewall transitions are natural boundaries on most coaches
- A featureless white wall is the hardest and most expensive case
- Rub rails help less than owners expect because the eye reads past them
Spray-Out Cards and Let-Down Panels
Before any color touches your coach, we spray a test card. A spray-out card is a primed card sprayed with the mixed color using the same gun, the same pressure, the same distance, and the same number of coats we intend to use on the vehicle. It is then cleared and cured so it can be held against the actual surface in daylight. Paint looks different wet than dry and different under shop lights than under sun, so the card is the only honest reference.
A let-down panel goes one step further and is how we solve metallic mismatches. The card is divided into sections sprayed at different gun distances and different numbers of coats, which changes how the metallic flake lays down. Comparing those sections against the coach tells us the exact spray technique that puts the flake at the same orientation as the factory finish. That is a technique variable, not a formula variable, and no computer match can supply it.
This step adds an hour or two of labor to a repair, and we do not skip it on anything metallic or pearl. Owners occasionally ask us to save that time. Our answer is that the alternative is spraying the coach and finding out, which is a far more expensive way to learn the same thing. A card costs a few dollars in material and twenty minutes of a technician. Correcting a mismatched sidewall means sanding off what was sprayed, re-masking, and re-shooting the entire blend zone at the body and paint rate, which is several hundred dollars minimum and often much more on a large panel.
Matching a Sun-Faded Original Finish
A ten year old coach that has lived outdoors in Southern California is not the color it left the factory. Ultraviolet exposure fades pigment, oxidizes the clear, and shifts the whole surface slightly. Mixing the factory formula and spraying it next to that surface produces a repair that is visibly newer, brighter, and often cooler in tone than the paint around it. The formula is correct and the result is still wrong.
What we do instead is match what is actually on the vehicle. That means tinting the mix toward the aged color using the spray-out card as the reference, sometimes several iterations, until the card disappears against the wall. This is skilled hand work and it is billed at the body and paint rate, which is why a match on a faded coach costs more than a match on a three year old one.
There is also a preparatory move that helps: polishing the surrounding area before the repair. Removing the oxidized top layer of clear brings the existing paint back toward its true color, which reduces how far we have to tint. On a badly weathered coach we will often recommend correcting the whole side first, then matching to the corrected surface. It is more work up front and a much better outcome.
- Fresh factory formula almost never matches a decade-old surface
- Tinting to the vehicle, not to the code, is the working method
- Polishing the surrounding area first reduces the tint required
- Every tint iteration is billed labor, so faded coaches cost more to match
- Cards are evaluated in daylight, never under shop lighting alone
When a Spot Repair Is the Wrong Call
There are jobs where we will recommend against spot work even though it is the smaller invoice. If the damage crosses a graphic that we cannot source or reproduce cleanly, if the sidewall is already showing chalking across the whole side, or if there are three or four separate damaged areas scattered along one wall, the blend zones start overlapping and you end up paying spot repair prices to refinish most of the panel anyway.
The break-even is usually around three separate repair areas on a single side, or one repair whose blend zone would exceed roughly a third of the wall. At that point, refinishing the entire side from cap to cap costs less per square foot, produces a uniform surface with no matching risk, and gives you a result that will not develop visible ghosting in two years as the repair and the original age at different rates.
We will always give you both numbers. Some owners want the cheapest defensible repair on a coach they plan to sell next season, and that is a legitimate decision. Others are keeping the coach for a decade and want the version that will still look right in year eight. Our job is to tell you plainly which one you are buying.
Honest Limits on Metallics and Pearls
Solid colors blend well and stay blended. Metallics are harder because the flake orientation has to match, and pearls are harder still because they contain a translucent layer whose appearance changes with viewing angle. A three-stage pearl on a ten year old coach is the most difficult match in this trade, and we will tell you before we start that a perfect result is not something anyone should promise.
What we can commit to is method: a proper spray-out, a let-down panel to dial in flake orientation, tinting to the aged surface, and a blend zone sized generously enough that the transition is gradual. With that process, a metallic spot repair on a well maintained coach is typically undetectable at conversational distance and only findable if you know exactly where to look and the light is at a bad angle.
Where we draw the line is candy finishes and heavy tri-coat pearls with large damage. On those, the honest recommendation is refinishing the full panel or the full side, because a blend that has to travel through a color-shifting layer will show. Telling an owner that up front is cheaper for everyone than discovering it after the booth time is spent.
- Solid colors: highest likelihood of an undetectable repair
- Metallics: achievable with a let-down panel and a generous blend zone
- Two-stage pearls: possible, but expect a larger blend and more tinting
- Candy and tri-coat: full panel or full side is usually the honest answer
- Age of the finish matters as much as the color technology
Questions
Frequently asked questions
How big does the blend area have to be?
Bigger than the damage, always. As a working rule, the color fade extends roughly three to four times the width of the repair in every direction, and the clear extends beyond that to the nearest natural stopping point. A six inch scrape on a compartment door might be contained to that door. The same scrape in the middle of a thirty foot sidewall could require clearing eight to twelve feet of wall because there is nothing closer to stop at. This is why we quote from a walkaround rather than a photo of the damaged spot alone.
Why does a small scratch cost several hundred dollars?
Because the scratch is not the work. A single scratch repair still requires masking the surrounding area, sanding and feathering the damage, priming if it went through to substrate, mixing and testing color, spraying base with a fade, applying and melting clear, then cutting and buffing the blend so it matches the surrounding gloss. That is four to six hours minimum at $210 per hour plus supplies at $55 per paint hour. There is no version of the process that skips steps and still produces a repair you cannot see.
Can you match my paint from the color code on the tag?
The code is a starting point, not an answer. It gives us the factory formula, which we mix and spray onto a test card. That card then gets held against your actual paint in daylight. On a coach less than about five years old that has lived under cover, the code match is often close enough to blend directly. On an older coach that has been outdoors, the code color will be noticeably brighter than the faded surface, and we tint from there. Expect one to three tint iterations on a weathered finish.
Will the repair still match in five years?
If it was blended properly, yes, in the sense that both surfaces age together from the same starting point. What causes long term mismatch is a repair that was sprayed over a badly oxidized surrounding area without correcting it first. The repair stays glossy while the original continues to dull, and within a couple of seasons you can see exactly where the work was done. Polishing the surrounding area before the repair, and keeping the coach washed and occasionally polished afterward, is what keeps a good blend invisible over time.
How long does a spot repair take?
Small single-area repairs are typically three to five business days in the shop. That is not five days of labor, it is labor plus cure windows. Primer needs time before sanding, base needs flash time between coats, and clear needs to cure before it can be cut and buffed. Larger multi-area repairs or anything requiring substrate work behind the paint run one to two weeks. If you need the coach back for a specific date, tell the estimator up front so we can schedule the booth block accordingly.
Is it cheaper to just touch it up myself with a paint pen?
For a rock chip smaller than a pencil eraser on a solid color, a touch-up pen is a reasonable way to keep water out of the substrate and we would not talk you out of it. For anything with length, a pen leaves a raised bead of paint that reads worse than the original scratch and has to be sanded off before a real repair. If you think you may eventually want the area repaired properly, avoid thick touch-up buildup and avoid any product containing silicone, which contaminates paint and causes fisheyes.
The scratch goes through to the fiberglass. Does that change anything?
Yes. Once you are through the gelcoat into the laminate, it stops being purely a paint job. The exposed fiberglass has to be cleaned, filled with an appropriate resin or filler, shaped, and sealed before any primer goes on, because paint over bare laminate will lift as moisture migrates. That adds hours and sometimes moves the job into structural territory if the impact was hard enough to have stressed the panel behind the visible damage. We probe and inspect before quoting so the estimate reflects the actual depth.
Can you repair damage on a wrapped or decaled area?
It depends on whether the graphic can be reproduced. If it is a printed vinyl we can scan, recreate, and reprint, we repair the substrate, refinish the base color, and apply a new section of graphic with the seam placed where it will not be obvious. If the graphic is a discontinued factory package with a complex gradient, matching a partial section is difficult and we will usually recommend replacing the full graphic panel from break to break so the seams land in logical places rather than mid-pattern.
Standard on every job
What is included
These are not upgrades. They are how the work is run on every vehicle that comes through the building.
Full teardown where it is needed
We do not estimate through a closed panel. If the damage path runs behind trim or skin, we open it and document what is actually there.
Written, itemized scope
Parts, labor hours, and materials listed separately against the posted rate, so every line is something you can question.
Direct carrier communication
We talk to the adjuster so you are not relaying technical detail between two parties who both expect you to already understand it.
Supplement handling
When teardown finds more than the original inspection, we document and submit the supplement rather than absorbing it into a vague overage.
Correct repair sequence
Structural before cosmetic, every time. A straight body over a bent frame is a repair that fails its second life.
Systems tested under load
Electrical, plumbing, generator, and climate systems are run and verified before delivery, not just reconnected and assumed good.
Photo documentation throughout
Before, during, and after. Useful for your records, and decisive if a claim is ever revisited.
Delivery walkthrough
We go over what was done, what was replaced, and what to watch, in person, with the vehicle in front of you.
How the work runs
Our six step repair process
The same sequence on every vehicle, whether it is a single coach or a fleet of box trucks.
- 01
Assessment and documentation
We put the vehicle on the floor, pull panels where we need to see behind them, and photograph everything. Hidden damage found now is damage that does not become a supplement argument later.
- 02
Written estimate
You get a line by line estimate with parts, labor hours, materials, and the posted rate applied to each. Nothing is bundled into a single number you cannot check.
- 03
Carrier coordination
If a claim is involved we deal with the adjuster directly, submit the documentation, and handle supplements when teardown reveals more than the first inspection showed.
- 04
Authorization and scheduling
Once the scope is approved we confirm the deposit, order parts, and give you a realistic slot. Special order parts drive the timeline more often than labor does.
- 05
Repair
Structural first, then body, then paint, then systems and interior. The sequence is not negotiable because each stage has to be right before the next one covers it up.
- 06
Quality check and delivery
Multi point inspection, systems tested under load, paint inspected under corrected lighting, and a walkthrough with you before the vehicle leaves.
Keep reading
Related pages
Related services
Vehicles we repair
Talk to a repair specialist today
Tell us what happened and we will tell you what the repair actually involves, what it costs, and how long it takes. We work directly with every major carrier and serve Westminster owners and fleets from our 35,000 square foot facility.
Posted labor rates are published on our prices page. Diagnostic and systems assessment fees are credited against an authorized repair.